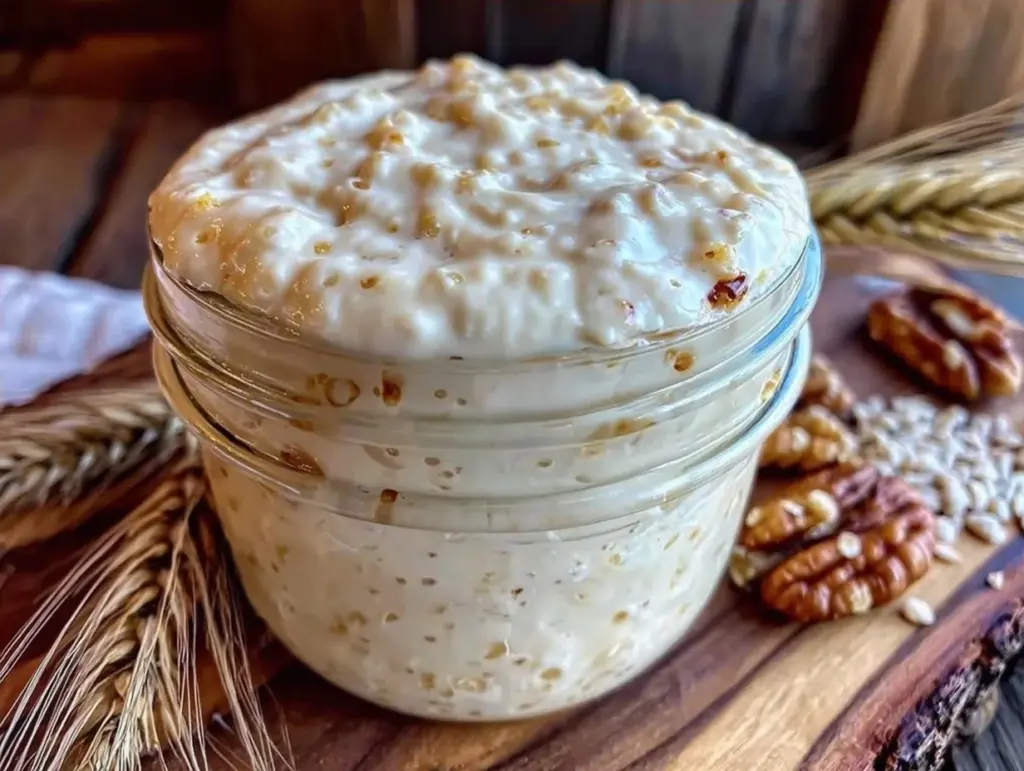
I still remember the smell of my grandmother’s kitchen on Sunday mornings. It wasn’t just coffee or bacon. It was that deep, tangy, slightly sour aroma that meant one thing: bread was rising. She didn’t use a thermometer. She didn’t have a fancy digital scale. She had a chipped blue ceramic jar, a wooden spoon that looked like it had seen a few decades, and a patience I was too young to understand then.
For years, I tried to rush it. I bought commercial yeast. I used instant starters from the internet. But nothing tasted like hers. Nothing had that complex, earthy flavor that made you stop chewing for a second and just breathe. It wasn’t until I moved into my first apartment, with a tiny kitchen and a stubborn refusal to buy store-bought bread, that I decided to try again. I called Nana. She didn’t send me a recipe card. She just said, “Listen to it. Wait for it. Don’t rush it.”
This is that story. This is the Beginner Friendly Sourdough Starter from Scratch. It’s not the fastest way. In fact, it’s arguably the slowest way. But it is the real way. It’s the way my grandmother made it, and the way I’ve refined it over the last five years of trial, error, and a few discarded jars. If you’ve ever felt intimidated by wild yeast, or if you’ve tried before and it smelled like vomit (don’t worry, it happens), this guide will change everything for you.
I’ve made this Beginner Friendly Sourdough Starter from Scratch more times than I can count. I’ve watched it bubble in the winter cold and struggle in the summer heat. I’ve learned that consistency matters more than precision. And I’ve learned that this little jar of flour and water is alive. It needs you. And in return, it gives you the best bread you’ll ever bake. Let’s get started.
Why You’ll Love This Approach
There’s a specific kind of magic in feeding a living thing every day. But beyond the emotional connection, there are practical reasons why this method wins every time. Here’s why this Beginner Friendly Sourdough Starter from Scratch is the one you’ll stick with:
It Builds Flavor Depth — Commercial yeast gives you lift, but wild yeast gives you soul. The longer fermentation allowed by a mature starter breaks down gluten and creates those complex, nutty, tangy notes that store-bought bread just can’t mimic. You’ll taste the difference immediately.
It’s Economical — Think about it. You’re making a starter with flour and water. That’s it. You’ll never need to buy sourdough bread again. The cost of a loaf of artisan sourdough is roughly $8. The cost of your starter? Pennies per week once it’s established. It pays for itself in two loaves.
It Teaches You to Read Dough — Modern recipes often rely on strict timers. Wild yeast is unpredictable. By learning this Beginner Friendly Sourdough Starter from Scratch, you learn to look at bubbles, smell the aroma, and feel the texture. These skills transfer to every other baked good you make, from biscuits to soft banana dessert bread.
It’s Patiently Rewarding — I know, “patience” isn’t usually a selling point. But the daily ritual of feeding your starter becomes a grounding part of your morning. It’s a moment to pause. It’s a connection to the past. It’s slower, yes, but it feels more meaningful.
It Adapts to Your Life — Once established, your starter can go weeks in the fridge if you’re traveling. It’s resilient. It’s forgiving. It’s a partner in your kitchen, not a demanding taskmaster.
This isn’t just about bread. It’s about slowing down and making something from nothing. This is my go-to when I want to feel connected to my roots and my kitchen.
Key Ingredients and Tools
You might think you need a lab to start a starter. You don’t. You need two things: flour and water. But not just any flour and any water. Here is exactly what I use, and why.
All-Purpose Flour (200 grams / 1 ¾ cups) — I start with unbleached all-purpose flour. It has enough protein to build structure but isn’t as heavy as bread flour. For the initial feedings, I stick to AP because it’s gentle on the new yeast. Once it’s active, I often switch to a mix of AP and whole wheat for flavor, but AP is the safest bet for beginners. Always use unbleached. Bleached flour has been treated with chemicals that can inhibit yeast activity.
Filtered Water (200 grams / ¾ cup + 2 tbsp) — This is crucial. If your tap water is heavily chlorinated, it will kill the wild yeast you’re trying to cultivate. I use filtered water, or let my tap water sit out uncovered for 24 hours to let the chlorine evaporate. The water should be lukewarm, around 75°F (24°C). Too hot, and you kill the microbes. Too cold, and they go dormant.
Whole Wheat Flour (Optional but Recommended) (50 grams / ½ cup) — After the first week, I introduce whole wheat flour. The bran and germ contain more wild yeast and bacteria than white flour. It kickstarts the fermentation process. It’s not strictly necessary for the Beginner Friendly Sourdough Starter from Scratch, but it helps you get to the “ready” stage faster.
Non-Metallic Container — I use a 1-liter glass jar. Glass is non-reactive and easy to clean. Avoid metal bowls for mixing, as the acidity can react with certain metals. A wide-mouth jar is best so you can see the bubbles and scrape the sides easily.
Plastic or Wooden Spoon — I use a wooden spoon for mixing. It’s gentle and doesn’t conduct heat. Avoid metal spoons if possible, though occasional use is fine. Just don’t store your starter in a metal bowl.
Scale — Yes, you need a scale. Cups are inaccurate for flour. A cup of flour can weigh anywhere from 120 to 150 grams depending on how packed it is. A scale ensures your hydration ratio is correct, which is vital for starter health.
Tools Needed
You don’t need fancy equipment. I started with a mason jar and a fork. Here’s what I recommend for a smooth experience:
1-Liter Glass Jar — I use a wide-mouth mason jar. It’s cheap, durable, and you can mark the level with a rubber band to track rising. Any glass jar with a loose lid works. Do not seal it tight; the starter needs to breathe.
Kitchen Scale — Essential for accuracy. I use a basic digital scale that measures in grams. It’s worth every penny. If you don’t have one, borrow one or buy a cheap one. It changes baking forever.
Plastic Spatula or Wooden Spoon — For mixing. I prefer a silicone spatula because it scrapes the sides of the jar clean, ensuring all the flour is incorporated. This prevents dry pockets of flour that can mold.
Rubber Bands — I keep a few rubber bands on hand to mark the starter’s level when I feed it. This helps you visually track how much it rises and falls, which tells you when it’s at its peak.
Plastic Wrap or Cloth — If your jar doesn’t have a lid, cover it with plastic wrap or a clean kitchen cloth secured with a rubber band. This keeps fruit flies out while allowing airflow.
How to Make Your Starter (Step-by-Step)
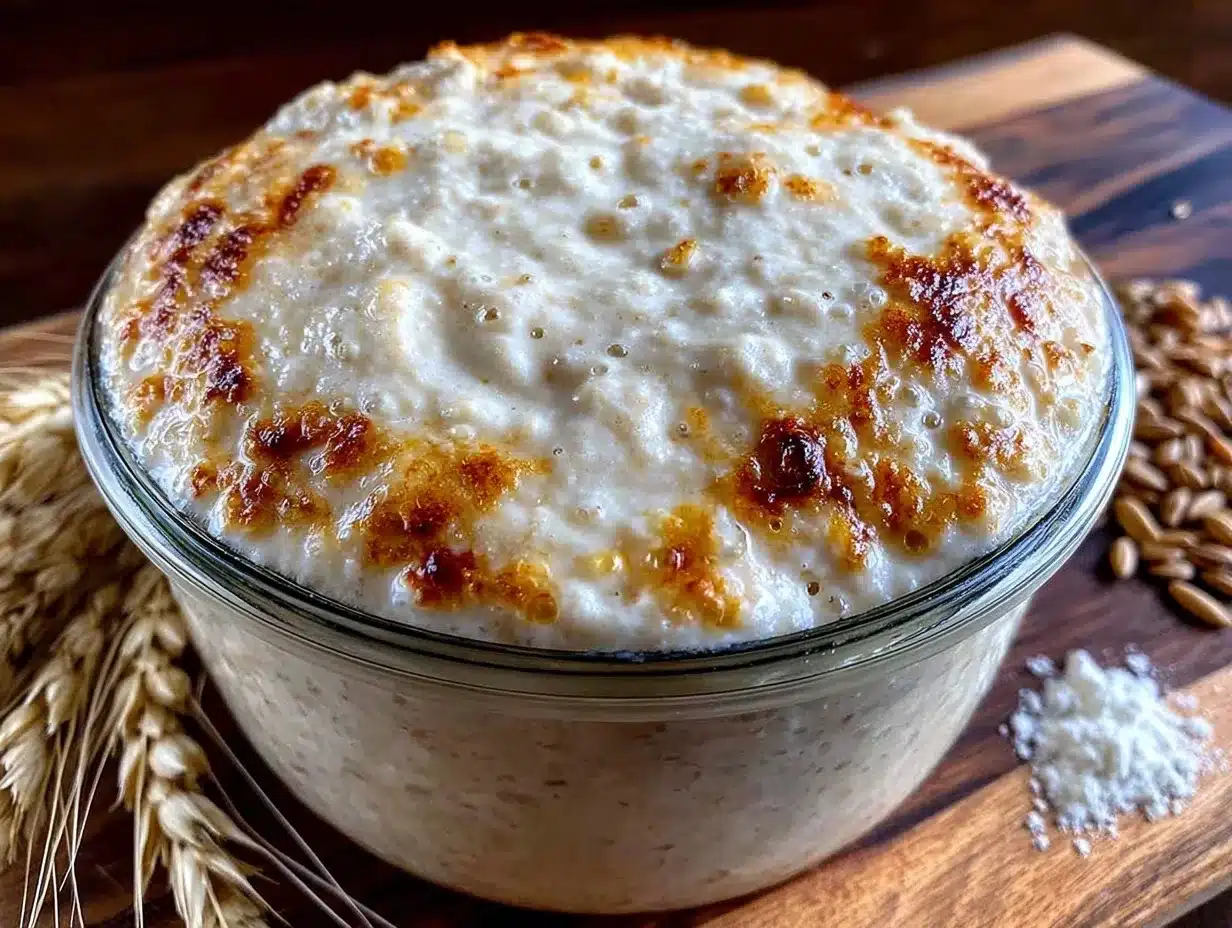
This process takes about 7-10 days. It requires daily attention, but each feeding takes less than five minutes. Here is exactly how I do it.
Day 1: The Mix (5 minutes)
In your glass jar, combine 50 grams of unbleached all-purpose flour and 50 grams of lukewarm filtered water. Mix thoroughly with your spatula or spoon until no dry flour remains. The mixture should look like thick paste, similar to peanut butter. If it’s too dry, add a teaspoon of water. If too wet, add a teaspoon of flour. Cover loosely with a cloth or lid. Let it sit at room temperature (around 70-75°F / 21-24°C) for 24 hours.
What to watch for: Nothing much will happen on Day 1. It might smell a bit like wet cardboard or damp earth. This is normal. Do not panic.
Day 2: The First Smell (5 minutes)
Check your jar. You might see a few small bubbles. It likely smells sour or slightly acidic. Discard half of the starter (save about 50 grams in the jar). Add 50 grams of flour and 50 grams of water. Mix well. Cover and let sit for 24 hours.
What to watch for: The smell might get stronger. It could smell like vinegar or old socks. This is the bacteria working. It’s supposed to smell funky. If it smells like acetone (nail polish remover), it’s hungry. Feed it.
Days 3-5: The Rise and Fall (5 minutes each)
Continue the same routine: Discard half, feed 50g flour and 50g water. Mix well. By Day 3 or 4, you should start seeing more bubbles. The starter might rise slightly and then fall. This is the beginning of the yeast cycle. It’s not stable yet, but it’s alive.
Tip: If your kitchen is cold, the starter will move slowly. Keep it in the warmest spot in your house, like near the fridge motor or on top of the oven. If it’s very warm, it might rise and fall quickly. Just stick to the 24-hour schedule.
Day 6: Introducing Whole Wheat (5 minutes)
Now, switch to using 25 grams of all-purpose flour and 25 grams of whole wheat flour for your feeding. Keep the water at 50 grams. Discard half. Mix well. The whole wheat will give the yeast a boost. You should see significant bubbling. The aroma should be pleasantly sour, like yogurt or vinegar, not rotting garbage.
Days 7-10: The Peak Test (5 minutes each)
Continue feeding daily with the 25g AP / 25g WW / 50g water ratio. Watch for a consistent pattern: the starter doubles in size within 4-6 hours of feeding, then falls. It should be full of bubbles. When you stir it, it should have a creamy, airy texture.
The Float Test: Once it reliably doubles, take a teaspoon of starter and drop it into a glass of water. If it floats, it’s ready! If it sinks, keep feeding for another day or two. The bubbles need to be strong enough to support the weight.
Total Time: 7-10 days of daily feeding. Total active time: less than 30 minutes.
Expert Tips from a Sourdough Veteran
I’ve killed more starters than I’d like to admit. I’ve had jars that smelled like vomit for weeks. I’ve had jars that grew mold. Here’s what I learned the hard way so you don’t have to.
Temperature is Everything
Wild yeast loves warmth. If your kitchen is below 65°F (18°C), your starter will be sluggish. I keep mine on top of the refrigerator, where the motor generates gentle heat. In winter, I might put the jar in a turned-off oven with the light on. Heat speeds up fermentation. Cold slows it down. Adjust your expectations based on the season.
Don’t Trust Your Nose Alone
It’s easy to think a starter is dead because it smells bad. But a healthy starter can smell surprisingly unpleasant in its early days. The key is the bubbles. If you see bubbles, it’s alive. If it smells like acetone, it’s hungry. If it smells like rotting meat, you might have contamination (rare, but possible). Stick with the bubbles.
Consistency Over Precision
You don’t need to be a scientist. If you miss a feeding by a few hours, it’s fine. If you forget to discard half, just feed it more flour and water to balance the hydration. The starter is resilient. Don’t stress over exact minutes. Stick to the rhythm.
Mold vs. Hooch
If you see a clear or dark liquid on top, that’s hooch. It means your starter is hungry. Pour it off or stir it in (it adds tanginess). If you see pink, orange, or green fuzz, that’s mold. Throw it out. Start over. Don’t risk it.
Feed It Before It Peaks
Once your starter is mature, feed it when it’s at its peak or just starting to fall. If you feed it when it’s already collapsed, the yeast is stressed. Feeding at the peak gives the new yeast a strong start.
Recipe Variations and Maintenance
Once your Beginner Friendly Sourdough Starter from Scratch is established, you don’t have to feed it daily. Here’s how to adapt it to your life.
The Fridge Method
If you’re not baking daily, store your starter in the refrigerator. Feed it once a week. Take it out, discard half, feed it, and put it back. Before baking, take it out 2-3 days early and feed it daily to bring it back to peak activity. This is how I keep mine when I’m busy.
Whole Grain Boost
For a more robust flavor, feed your starter with 100% whole wheat or rye flour. Rye is particularly high in enzymes and wild yeast, making it a great feeder. I sometimes feed my starter with rye flour once a week to keep it vigorous.
Discard Recipes
You’ll have a lot of discard. Don’t waste it! Use it in creamy ricotta dessert cake for tanginess, or make pancakes, waffles, or crackers. The discard doesn’t need to be active; it just needs to be sour.
Gluten-Free Option
You can make a gluten-free starter using rice flour or sorghum flour. The process is the same, but the yeast culture will be different. It’s less elastic but still flavorful. It’s a great option for those with sensitivities.
Serving and Storage
Your starter is a living culture. Here’s how to keep it happy.
Room Temperature Storage
If you bake daily, keep it on the counter. Feed it every 24 hours. It will be at its most active and flavorful.
Refrigerator Storage
If you bake weekly, keep it in the fridge. Feed it once a week. It will be slower but still viable. Before using, feed it 2-3 times over 2-3 days to wake it up.
Freezing
Yes, you can freeze your starter! Feed it, let it peak, then freeze it in ice cube trays. Once frozen, pop the cubes into a bag. You can thaw a cube when you’re ready to start a new batch. It’s a great way to preserve a beloved starter.
Long-Term Storage
If you’re going away for a month, dry your starter. Spread it thin on a baking sheet and let it dry completely. Crumble it up and store it in an airtight container. To revive, mix with water and flour and wait a week. It’s like a time capsule.
Nutrition Information
I’m not a nutritionist, but here’s the breakdown for a standard feeding (50g flour, 50g water).
| Nutrient | Per Feeding (approx.) |
|---|---|
| Calories | 180 |
| Protein | 5g |
| Carbohydrates | 36g |
| Fiber | 2g |
| Fat | 1g |
| Sodium | 0g |
My Take: The starter itself isn’t really “eaten” in large quantities. It’s used as a leavening agent. The fermentation process breaks down some of the gluten and phytates, making the bread easier to digest. It’s a healthy, natural way to bake. Just remember, the bread you make with it is still bread. Enjoy it in moderation.
Final Thoughts
Starting a sourdough starter is one of the most rewarding things you can do in the kitchen. It’s a relationship. It’s a habit. It’s a connection to the past. This Beginner Friendly Sourdough Starter from Scratch is not just a recipe; it’s a practice. It teaches you patience, observation, and trust.
If you make this, drop a comment! I love hearing how your starter turns out. Did it smell like vinegar? Did it float? Did you make your first loaf? Share it with me. I’m here to help.
Happy cooking!
FAQs
Q: My starter smells like vomit. Is it dead?
A: Not necessarily. In the first week, a sourdough starter can smell surprisingly unpleasant. It’s the bacteria working. As long as you see bubbles and it’s rising, it’s alive. The smell usually mellows out as the yeast population increases. If it smells like rotting meat or has mold, toss it. Otherwise, keep feeding it.
Q: Can I use bread flour instead of all-purpose?
A: You can, but I recommend starting with all-purpose. Bread flour has more protein, which can make the starter stiff and hard to mix. Once your starter is active, you can switch to bread flour or a mix for a stronger rise. But AP is more forgiving for beginners.
Q: How do I know when my starter is ready to bake with?
A: The float test is the best indicator. Take a teaspoon of starter and drop it in a glass of water. If it floats, it’s full of gas and ready to leaven dough. It should also double in size within 4-6 hours of feeding.
Q: Can I feed my starter with milk?
A: No. Sourdough starter needs flour and water. Milk contains sugars and proteins that can spoil quickly and create an environment for bad bacteria. Stick to water and flour.
Q: My starter isn’t rising. What’s wrong?
A: It’s likely too cold. Wild yeast is sluggish in cold temperatures. Move your starter to a warmer spot in your kitchen. It might also be hungry. Try feeding it twice a day for a day or two to build up the yeast population.
Q: How long does a starter last?
A: A well-maintained starter can last indefinitely. I’ve seen starters passed down for generations. With regular feeding or refrigeration, your starter will live as long as you care for it.
Pin This Recipe!
Beginner Friendly Sourdough Starter: Grandma’s Real Way
- Total Time: 7-10 days
- Yield: 1 starter (approx. 100g active starter) 1x
Description
A traditional, slow-fermentation sourdough starter guide based on family tradition. This method uses simple ingredients like flour and water to cultivate wild yeast, resulting in deep flavor and a resilient starter that pays for itself.
Ingredients
- 200 grams (1 ¾ cups) unbleached all-purpose flour
- 200 grams (¾ cup + 2 tbsp) filtered lukewarm water (approx. 75°F/24°C)
- 50 grams (½ cup) whole wheat flour (optional, recommended after first week)
Instructions
- Day 1: In a glass jar, combine 50g unbleached all-purpose flour and 50g lukewarm filtered water. Mix until no dry flour remains (consistency of thick paste). Cover loosely and let sit at room temperature (70-75°F) for 24 hours.
- Day 2: Check for bubbles. Discard half of the starter (save ~50g). Add 50g flour and 50g water. Mix well, cover, and let sit for 24 hours.
- Days 3-5: Continue the routine: discard half, feed 50g flour and 50g water. Mix well. By Day 3-4, bubbles should appear. Keep in a warm spot if kitchen is cold.
- Day 6: Switch feeding to 25g all-purpose flour, 25g whole wheat flour, and 50g water. Discard half. Mix well. Expect significant bubbling and a pleasant sour aroma.
- Days 7-10: Continue feeding daily with the 25g AP / 25g WW / 50g water ratio. Watch for consistent doubling in size within 4-6 hours.
- Float Test: Once it reliably doubles, drop a teaspoon of starter into a glass of water. If it floats, it is ready. If it sinks, continue feeding for another day or two.
Notes
Use filtered water to avoid chlorine killing the yeast. Keep the starter in a warm spot (70-75°F). If you see pink, orange, or green fuzz, it is mold and should be discarded. Clear liquid on top (hooch) means it is hungry; stir it in or pour it off. For storage, keep at room temperature if baking daily, or refrigerate if baking weekly.
- Prep Time: 5 minutes per day
- Cook Time: 0 minutes
- Category: Baking
- Cuisine: American
Nutrition
- Serving Size: 1 feeding (50g flour
- Calories: 180
- Fat: 1
- Carbohydrates: 36
- Fiber: 2
- Protein: 5
Keywords: sourdough starter, wild yeast, bread making, fermentation, beginner baking, homemade bread, sourdough recipe


