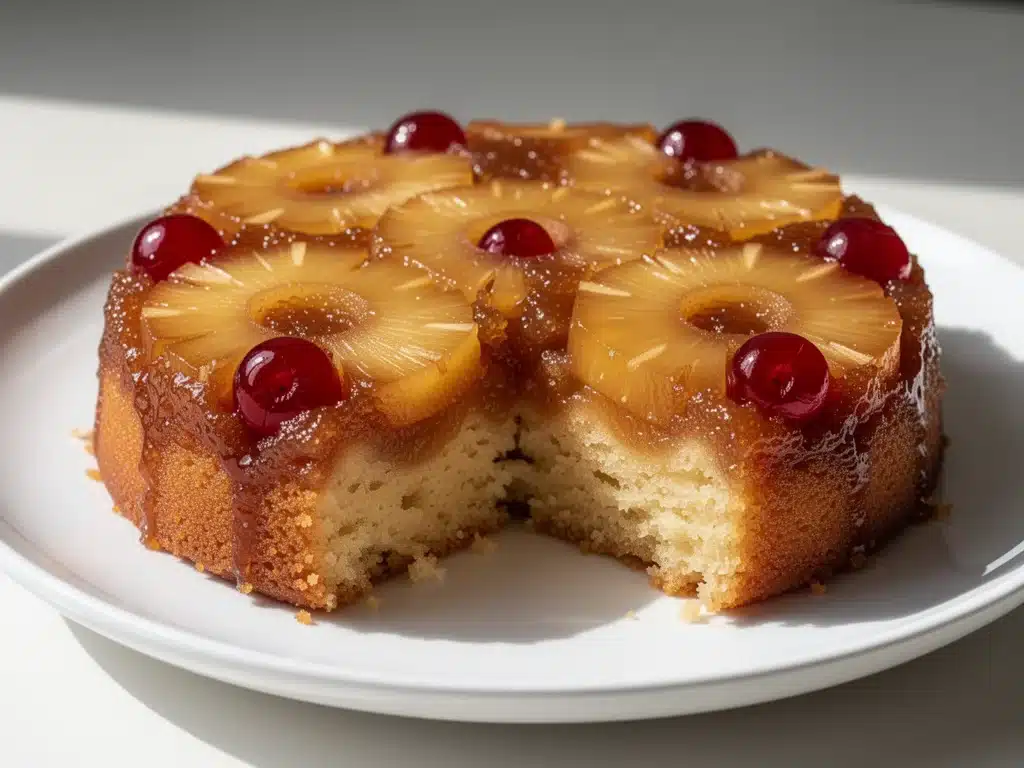
I still remember the smell. It wasn’t just sugar and butter—it was warm, caramelized pineapple with a hint of maraschino cherry that filled the entire house by 8 a.m. on a rainy Sunday in Atlanta. I was seven years old, standing on a step stool in my grandmother’s kitchen, watching her flip that heavy cast-iron skillet onto a plate with the kind of confidence that comes from forty years of making this exact dessert.
Her kitchen was small, cluttered with mismatched mugs and a refrigerator that hummed louder than the television in the living room. But when she pulled that cake out of the oven, the room seemed to shrink just to accommodate the aroma. She didn’t measure anything. She just poured, stirred, and waited. And when she flipped it over, the glaze didn’t just sit on top—it was part of the cake. Glossy, amber, and dripping with juice.
I’ve made this pineapple upside-down cake dozens of times since then. Some attempts were too dry, some were too sweet, and once, I burned the bottom so badly I had to scrape it off and serve it as “rustic caramelized pineapple with a side of guilt.” But after years of tweaking, testing, and perfecting the ratio of brown sugar to butter to pineapple rings, I finally have the one that tastes exactly like her Sunday mornings.
This isn’t just a dessert. It’s a comfort food that feels like a hug. It’s the kind of cake that makes people ask, “What is that smell?” and then immediately pull up a chair. It’s classic Southern hospitality on a plate, and it’s easier to make than you think.
So, grab your mixing bowl. Let’s make something that smells like home.
Why You’ll Love This Pineapple Upside-Down Cake Recipe
There are a million ways to make a cake. You could buy a mix, you could order from a bakery, or you could try a fancy French pastry that requires three hours and a temperamental oven. But this pineapple upside-down cake? It’s different. It’s reliable, it’s forgiving, and it always, always turns out beautiful.
Here’s why this recipe has earned a permanent spot in my rotation:
- It’s foolproof for beginners — Seriously. If you can melt butter and arrange fruit, you can make this. I’ve taught my teenage neighbor how to bake it over the phone. He didn’t burn a single ring.
- It looks impressive but takes zero skill — The “flip” is the magic moment. It turns a simple cake batter into a showstopper. Guests think you spent hours on it. (Spoiler: They’re right about the hours, but wrong about the skill.)
- It’s naturally gluten-free friendly — Wait, really? Yes! Because there’s no flour in the topping layer, and the cake batter itself can be made with almond flour or a simple GF blend without changing the texture much. It’s naturally lighter than most dense cakes.
- It tastes better the next day — I know, I know, fresh out of the oven is best. But this cake actually gets moister and more flavorful as the caramel soaks into the sponge overnight. It’s perfect for meal prep.
- It’s budget-friendly — Canned pineapple is cheap, especially in winter when fresh fruit is pricey. This cake costs about $8 to make and feeds 8-10 people. That’s less than $1 per slice.
This is my go-to when I need to bring something to a potluck, celebrate a birthday, or just need a reason to wear an apron on a Tuesday. It’s warm, it’s sweet, and it never fails to make people smile.
Ingredients You’ll Need for the Perfect Cake
Here’s the thing about this recipe: the quality of three ingredients matters more than the rest. If you skimp on the butter or use low-quality pineapple, the whole thing suffers. But don’t worry, most of this is pantry staples.
For the Caramel Topping
Unsalted butter (½ cup / 113g) — This is the base of the caramel. I use unsalted so I can control the saltiness. If you only have salted, reduce the added salt in the cake by half. Don’t use margarine. It won’t caramelize right, and it tastes weird.
Dark brown sugar (1 cup / 200g) — Light brown sugar works, but dark brown has more molasses, which gives that deep, toffee-like flavor. This is what makes the topping glossy and rich. Pack it down when you measure it.
Pineapple rings (1 can, 20 oz / 565g) — Use the ones in juice, not syrup. Syrup is too sweet and watery. Juice rings keep the flavor bright. Drain them well, but don’t dry them out completely—you want some moisture to mix with the butter.
Maraschino cherries (12-16 cherries) — The classic touch. I pit them because nobody wants a surprise pit in their bite. If you can’t find pitted cherries, use a small knife to remove the stems. It takes two minutes.
For the Cake Batter
All-purpose flour (1 ½ cups / 190g) — Standard stuff. I sift mine, but it’s not mandatory. If you’re making this gluten-free, use a 1:1 GF blend.
Baking powder (1 teaspoon) — Make sure it’s fresh. Old baking powder is the reason your cake turns into a hockey puck. If it’s been in your cabinet for two years, toss it.
Salt (½ teaspoon) — Just a pinch to balance the sweetness. Don’t skip it.
Unsalted butter (½ cup / 113g, softened) — This goes into the batter. Softened means you can press a finger into it easily. Not melted. Not cold. Soft.
Granulated sugar (1 cup / 200g) — Standard white sugar for the cake structure.
Large eggs (2) — Room temperature is key. Cold eggs can curdle the butter mixture. Take them out of the fridge 30 minutes before you start.
Vanilla extract (1 teaspoon) — Pure vanilla, not imitation. Your cake will taste like chemicals otherwise.
Milk (½ cup / 120ml) — Whole milk is best for richness. Buttermilk is even better if you have it—it adds tang and tenderness. I usually keep buttermilk on hand just for baking.
Equipment You’ll Need
You don’t need a fancy kitchen for this. Here’s what I actually use:
9-inch round cake pan — Glass or metal works fine. I prefer glass because it heats evenly, but metal is faster. Avoid dark non-stick pans if you can—they might burn the bottom.
9-inch cast iron skillet — Optional, but traditional. My grandmother used this, and it gives the edges a perfect crispness. If you use a skillet, you cook the topping in the skillet, then bake in it, then flip onto a plate. It’s beautiful but heavy.
Mixer — Hand mixer or stand mixer. You can do it by arm, but why suffer? A mixer ensures the butter and sugar are creamed properly, which makes the cake light.
Measuring cups and spoons — Be accurate with the flour. Scooping directly from the bag packs it down and leads to a dry cake. Spoon it in and level it off.
Wire cooling rack — Essential for cooling the cake evenly. If you leave it in the pan too long, steam builds up and makes the bottom soggy.
Large plate — The one you’ll flip the cake onto. Make sure it’s bigger than your pan!
How to Make It: Step-by-Step
Alright, let’s bake. I’m walking you through exactly how I do it, including the little tricks that keep the pineapple from sinking and the caramel from burning.
Step 1: Prep the Pan and Oven (5 minutes)
Preheat your oven to 350°F (175°C). If you’re using a cake pan, grease it lightly with butter or cooking spray. If you’re using a cast-iron skillet, don’t grease it—the butter in the topping will do the job.
Step 2: Make the Caramel Layer (5 minutes)
In your cake pan or skillet, combine the ½ cup of melted butter and the brown sugar. Stir them together until it looks like wet sand. Spread it evenly over the bottom. This is going to bubble up in the oven, so don’t panic.
Pro Tip: If you’re using a glass pan, put it in the cold oven and then turn the oven on. Glass can crack if you put it in a hot oven with cold ingredients.
Step 3: Arrange the Pineapple (5 minutes)
Drain the pineapple rings well. Pat them dry with a paper towel—this is crucial. Too much juice and your caramel gets watery. Place the rings in a single layer over the brown sugar mixture. Overlap them slightly if needed to cover the bottom completely.
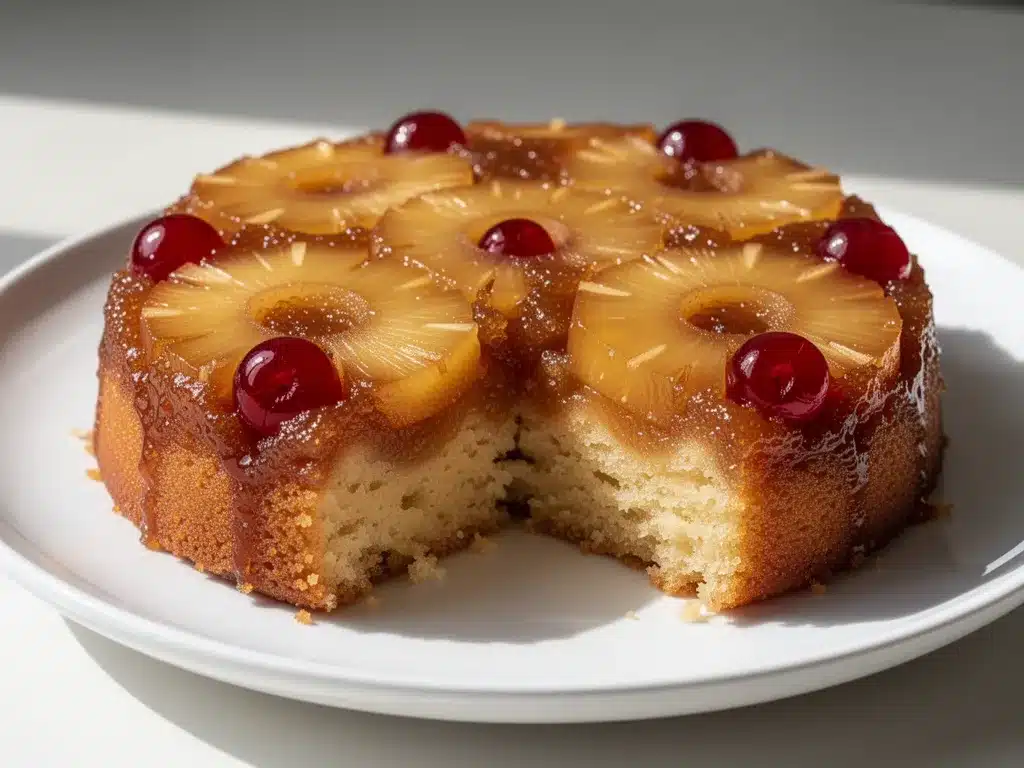
Place one cherry in the center of each pineapple ring. This is the classic look, and it’s what makes people think you’re a professional baker.
Step 4: Make the Batter (10 minutes)
In a medium bowl, whisk together the flour, baking powder, and salt.
In a large bowl, beat the softened butter and granulated sugar until light and fluffy. This takes about 3-4 minutes with a mixer. It’s the secret to a tender cake.
Add the eggs one at a time, beating well after each addition. Mix in the vanilla.
Alternately add the dry ingredients and the milk, starting and ending with the dry ingredients. Mix just until combined. Do not overmix! Overmixing makes the cake tough.
Step 5: Assemble and Bake (35-40 minutes)
Spread the batter evenly over the pineapple rings. Use a spatula to smooth it out. Be gentle—you don’t want to displace the fruit.
Bake in the preheated oven for 35-40 minutes. The cake is done when a toothpick inserted into the center comes out clean, and the edges are golden brown. If the top is browning too fast, cover it loosely with foil after 25 minutes.
Step 6: The Flip (The Moment of Truth)
Remove the cake from the oven and let it cool in the pan for 10 minutes. This is important. If you flip it too soon, the caramel is too hot and runs everywhere. If you wait too long, it sticks.
Place your large plate over the top of the pan. Holding the plate and pan firmly together, flip them over in one confident motion. Lift the pan off. If some pineapple sticks, just push it back onto the cake. It happens to the best of us.
Let it cool completely before slicing. The caramel will set as it cools, making it easier to cut.
Expert Tips & Tricks for Success
I’ve made this cake enough times to know where people go wrong. Here’s how to avoid my mistakes:
Drain the Pineapple Thoroughly
I can’t stress this enough. If your pineapple is wet, your caramel will be soupy. Use paper towels. Squeeze the rings gently. It takes an extra minute but saves the whole cake.
Don’t Skip the Cool-Down
I’m impatient. I want to eat it now. But if you flip it while it’s piping hot, the caramel burns your hands and drips all over your counter. Ten minutes is all it takes. Trust me.
Room Temperature Ingredients
Cold eggs and butter don’t emulsify well. Your batter will look curdled, and your cake will be dense. Take your eggs and butter out of the fridge when you start preheating the oven.
Use a Plate Bigger Than the Pan
If your plate is smaller than your pan, you’ll lose cake. And caramel. And dignity. Use a large dinner plate, not a salad plate.
For Extra Flavor
Add a teaspoon of rum extract to the batter for a tropical twist. Or add a pinch of nutmeg. It’s subtle but amazing.
Variations & Substitutions
Once you’ve mastered the classic, here’s how to mix it up:
Dumpling Cake
This is a regional variation where you drop dollops of batter over the pineapple instead of spreading it evenly. It creates a craggy, rustic top. I love this version for its texture.
Coconut Version
Add ½ cup of shredded coconut to the batter. Or sprinkle toasted coconut on top after flipping. It pairs perfectly with the pineapple.
Gluten-Free
Use a 1:1 gluten-free flour blend. The texture is slightly denser but still delicious. I’ve used King Arthur and Bob’s Red Mill, and both work well.
Dairy-Free
Substitute the butter with coconut oil or a vegan butter stick. Use almond milk instead of dairy milk. The flavor changes slightly but it’s still great.
Fruit Swap
While pineapple is classic, you can use peaches or apricots. For peaches, slice them thin and arrange them like the pineapple. It’s like grilled peaches dessert but baked. Or try a peach cobbler vibe with peach cobbler bars if you want something even easier.
Serving & Storage
How to Serve:
I serve this warm or at room temperature. It’s often served with a dollop of whipped cream or a scoop of vanilla ice cream. The contrast of hot cake and cold cream is heavenly. For a summer party, it pairs beautifully with a honey lavender iced latte or a light white wine.
Storage:
Store leftovers in an airtight container at room temperature for up to 3 days. The caramel keeps it moist. In the summer, or if your house is hot, store it in the fridge for up to 5 days.
Reheating:
Microwave a slice for 15-20 seconds to warm it up. The caramel will become liquid and gooey again. Avoid the oven unless you’re reheating a large portion, as it can dry out the edges.
Freezing:
You can freeze this cake! Wrap individual slices tightly in plastic wrap, then in foil. Freeze for up to 2 months. Thaw in the fridge overnight. The texture might be slightly softer, but it’s still delicious.
Nutrition Information
I’m not a nutritionist, but here’s the breakdown if you’re tracking. This is a rich, sweet dessert, so moderation is key.
Per Slice (1/8 of cake):
- Calories: 380
- Fat: 16g
- Carbs: 58g
- Fiber: 1g
- Sugar: 42g
- Protein: 4g
It’s high in sugar due to the brown sugar topping and pineapple, but the cake itself is relatively light on protein and fiber. If you’re watching your sugar, consider serving smaller slices with fresh berries instead of whipped cream.
Final Thoughts
So that’s my pineapple upside-down cake! It’s simple, it’s nostalgic, and it’s guaranteed to impress. I’ve made it for holidays, birthdays, and random Tuesday nights when I just needed something sweet. It never fails.
Make it yours! Try the dumpling version, add coconut, or swap the cherries for blueberries. The best recipes are the ones you adapt to your family’s tastes.
If you make this, drop a comment and let me know how it turned out! I love hearing from you. And if something doesn’t work, tell me—I’m here to help troubleshoot.
Happy baking! And I hope your kitchen smells half as good as mine does right now.
Frequently Asked Questions
Q: Can I use fresh pineapple instead of canned?
A: You can, but it’s trickier. Fresh pineapple has enzymes (bromelain) that can make the cake gummy if not cooked properly. If you use fresh, slice it thin and pat it very dry. You’ll need about 2-3 cups of rings. Canned is easier and more consistent for this recipe.
Q: Why did my cake stick to the pan?
A: This usually happens if you flipped it too soon or if the caramel wasn’t spread evenly. Make sure the butter and sugar are fully melted and mixed before adding the pineapple. Also, let it cool for at least 10 minutes before flipping.
Q: Can I make this ahead of time?
A: Yes! Bake it the day before, let it cool, and store it covered at room temperature. It actually tastes better the next day as the flavors meld. Just flip it onto a serving plate the night before so it’s ready to go.
Q: Can I freeze the cake?
A: Yes, freeze it after flipping. Wrap it tightly in plastic and foil. It keeps for up to 2 months. Thaw in the fridge overnight. The texture might be slightly softer, but it’s still delicious.
Q: Why is the bottom of my cake soggy?
A: This happens if the caramel is too thin or if the cake wasn’t baked long enough. Make sure your pineapple is well-drained, and bake until a toothpick comes out clean. If the bottom is still soft, let it cool longer in the pan to allow the caramel to set.
Q: Can I use a square pan instead of round?
A: Yes, but adjust the baking time. A 9×9 square pan will take about 30-35 minutes. Keep an eye on it, as square pans can bake faster than round ones.
Q: What if I don’t have buttermilk?
A: Use regular milk. Or make your own by adding 1 tablespoon of lemon juice or vinegar to 1 cup of milk. Let it sit for 5 minutes before using. It’ll work just fine.
Pin This Recipe!
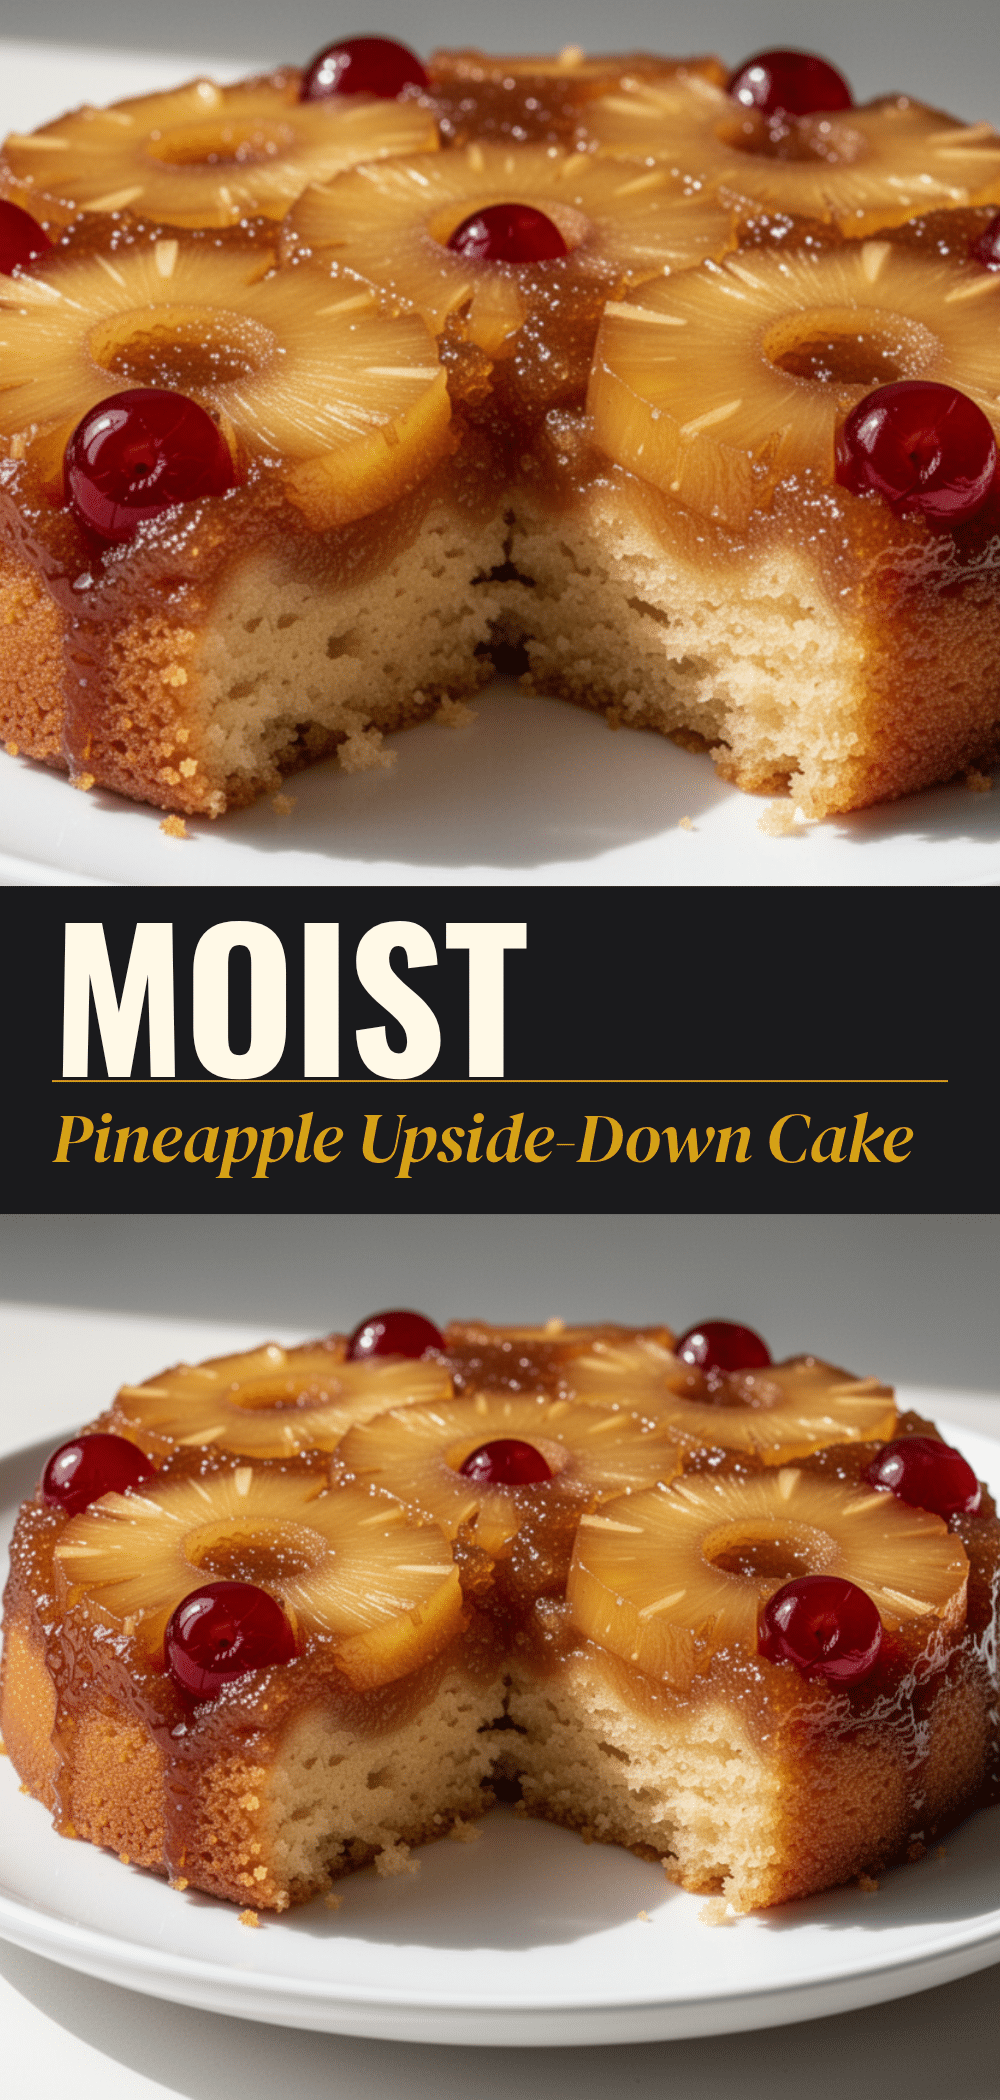
Pineapple Upside-Down Cake: Easy Classic Southern Dessert
- Total Time: 1 hour
- Yield: 8 servings 1x
Description
A nostalgic, foolproof Southern dessert featuring caramelized pineapple and maraschino cherries on a tender cake base. This classic recipe is reliable, budget-friendly, and tastes even better the next day.
Ingredients
- 1/2 cup (113g) unsalted butter (for topping)
- 1 cup (200g) dark brown sugar, packed
- 1 can (20 oz / 565g) pineapple rings in juice, drained and patted dry
- 12–16 maraschino cherries, pitted
- 1 1/2 cups (190g) all-purpose flour
- 1 teaspoon baking powder
- 1/2 teaspoon salt
- 1/2 cup (113g) unsalted butter, softened (for batter)
- 1 cup (200g) granulated sugar
- 2 large eggs, room temperature
- 1 teaspoon pure vanilla extract
- 1/2 cup (120ml) whole milk or buttermilk
Instructions
- Preheat oven to 350°F (175°C). Grease a 9-inch round cake pan lightly with butter or cooking spray.
- In the prepared pan, combine the 1/2 cup melted butter and brown sugar. Stir until it resembles wet sand and spread evenly over the bottom.
- Drain pineapple rings thoroughly and pat dry with paper towels. Arrange rings in a single layer over the brown sugar mixture, overlapping slightly to cover the bottom. Place one cherry in the center of each ring.
- In a medium bowl, whisk together flour, baking powder, and salt.
- In a large bowl, beat the softened butter and granulated sugar until light and fluffy (3-4 minutes).
- Add eggs one at a time, beating well after each addition. Mix in vanilla extract.
- Alternately add the dry ingredients and milk to the butter mixture, starting and ending with dry ingredients. Mix just until combined; do not overmix.
- Spread batter evenly over the pineapple rings, smoothing with a spatula.
- Bake for 35-40 minutes, or until a toothpick inserted into the center comes out clean and edges are golden brown. Cover loosely with foil if browning too quickly after 25 minutes.
- Remove from oven and let cool in the pan for 10 minutes.
- Place a large plate over the pan. Holding firmly, flip the pan and plate together in one confident motion. Lift pan off. Push any stuck pineapple back onto the cake.
- Let cool completely before slicing to allow caramel to set.
Notes
Ensure pineapple is thoroughly drained and patted dry to prevent a soupy caramel. Use room temperature eggs and butter for proper emulsification. The cake tastes better the next day as flavors meld. Can be made gluten-free using a 1:1 GF flour blend or dairy-free using coconut oil and almond milk.
- Prep Time: 20 minutes
- Cook Time: 40 minutes
- Category: Dessert
- Cuisine: Southern
Nutrition
- Serving Size: 1 slice (1/8 of cake
- Calories: 380
- Sugar: 42
- Sodium: 250
- Fat: 16
- Saturated Fat: 8
- Carbohydrates: 58
- Fiber: 1
- Protein: 4
Keywords: pineapple upside-down cake, southern dessert, classic cake, easy baking, caramelized pineapple, maraschino cherries, comfort food


