I have a confession to make. Three years ago, I tried to make chocolate truffles for a holiday gift exchange. I thought I was being sophisticated, wrapping them in gold foil and tying them with twine. The problem? I didn’t temper the chocolate. By the time I arrived at the party, the truffles had melted into a gooey, sad mess inside their wrappers. I had to hand out lumpy, misshapen blobs to my neighbors, and I was mortified.
That was the moment I realized I needed a dessert that was elegant but impossible to mess up. I needed something that looked like it came from a high-end Parisian patisserie but could actually be made in my kitchen after a long day at work. Enter the Rich Dark Chocolate Cups.
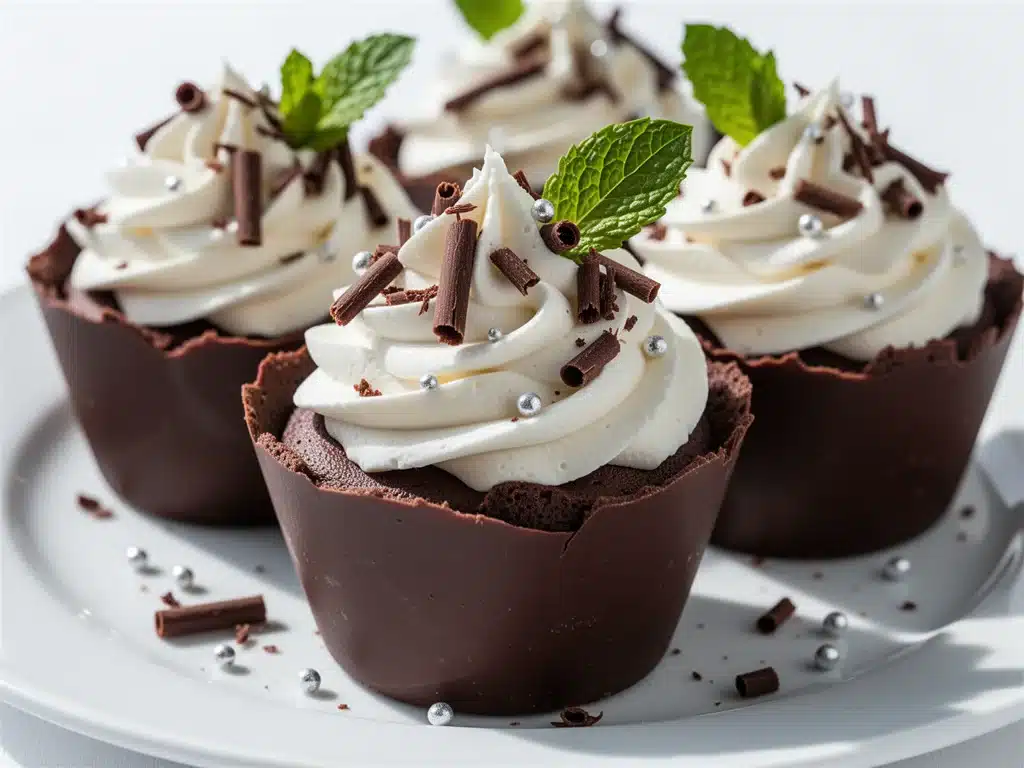
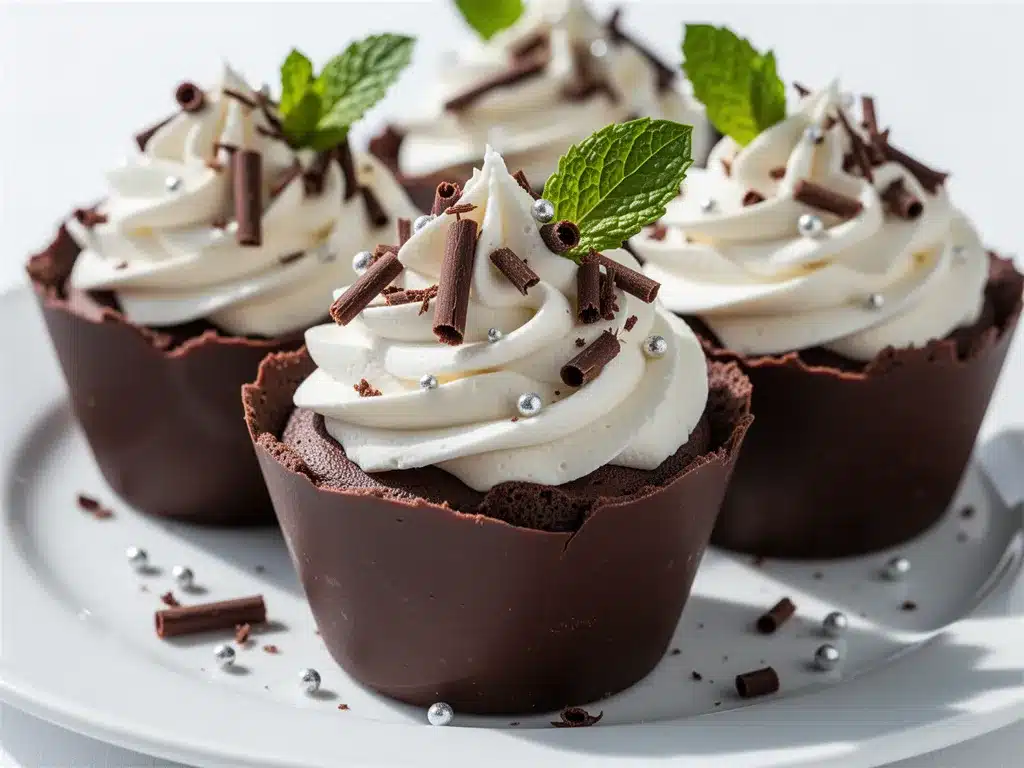
These aren’t just chocolate shells; they’re little edible jewels. They’re crisp, they snap when you bite into them, and they hold their shape in the heat. I’ve made these dozens of times now—sometimes for dinner parties, sometimes just to satisfy my own late-night chocolate cravings—and they have never failed me. Unlike my truffle disaster, these cups are foolproof. You don’t need a candy thermometer. You don’t need a double boiler if you know the trick. And the best part? You only need five ingredients.
I’ve been perfecting this method for a while, tweaking the ratio of cocoa butter to chocolate to get that perfect snap, and I’m finally ready to share it with you. Whether you’re looking for a sophisticated end to a dinner party or a fancy snack to keep on hand, these dark chocolate cups are the answer. They’re beautiful, they’re simple, and they taste like pure indulgence.
Why You’ll Love This Recipe
There’s something deeply satisfying about making something that looks incredibly difficult but is actually quite simple. These rich dark chocolate cups check every box for the modern home baker who wants results without the stress. Here’s why this recipe has become a staple in my kitchen:
- Zero Fancy Equipment Needed — Seriously, if you have a microwave or a saucepan and a spoon, you can do this. No candy thermometer, no marble slab, no tempering station. I’ve made these using my microwave on low power, and the results are just as good as the stovetop method.
- Elegant Presentation — These look like they cost $8 each at a boutique chocolate shop. The glossy finish and the clean edges make them look professional, even if you’re a beginner. Guests always assume you bought them from a fancy store.
- 5 Ingredients Max — Simplicity is key. You don’t need a pantry full of specialty items. Just chocolate, cocoa butter, a little fat for shine, and maybe a pinch of salt or flavoring. It’s clean, it’s minimal, and it’s delicious.
- Make-Ahead Friendly — These are actually better when made a day ahead. The chocolate sets fully, the flavors deepen, and they stay in the fridge ready to serve. I often make a batch on Sunday to have for the week, or a few days before a party so I’m not stressed.
- Versatile Filling Options — While they are delicious empty, they shine when filled. I love them with a soft center, whether it’s a ganache, a nut praline, or even just a bit of sea salt. It’s a blank canvas for your creativity.
This recipe has saved me more times than I can count. It’s my go-to when I need a dessert that feels special but requires zero effort. It’s the kind of treat that makes you feel like a pro chef, even if you’re wearing sweatpants.
Ingredients You’ll Need
One of the biggest misconceptions about chocolate work is that it requires obscure, hard-to-find ingredients. That’s not true at all. For these rich dark chocolate cups, you’ll likely have most of this already, or you can grab it at any well-stocked grocery store. Here’s exactly what you need and why each part matters.
The Base
High-Quality Dark Chocolate (12 ounces / 340g) — This is the star of the show. I recommend using chocolate with at least 60% cocoa solids. Brands like Ghirardelli, Lindt, or Valrhona work beautifully. Avoid “chocolate baking bars” that have added stabilizers; you want pure chocolate for the best snap and flavor. If you’re using chocolate chips, know that they contain stabilizers that can make the final product softer and less glossy. For the best results, chop up actual chocolate bars.
Cocoa Butter (1 tablespoon / 14g) — This is the secret ingredient for that professional shine and snap. Cocoa butter is the natural fat found in chocolate. Adding a little extra helps the chocolate flow better when melting and ensures it hardens with a beautiful, glossy finish. You can find this in the baking aisle of most large grocery stores or online. If you absolutely cannot find it, you can substitute with a tiny bit of coconut oil, but the shine won’t be quite as perfect.
Unsalted Butter (1 teaspoon / 5g) — Just a small amount. This helps emulsify the chocolate and adds a little richness and smoothness. It prevents the chocolate from becoming too brittle. Don’t skip this, but don’t overdo it either—too much fat can make the cups soft.
The Flavor Enhancers
Fine Sea Salt (¼ teaspoon) — Even if you’re making sweet chocolate, a pinch of salt is non-negotiable. It heightens the chocolate flavor and adds a sophisticated taste profile. I use Maldon sea salt flakes if I’m sprinkling on top, but fine sea salt works great mixed into the melt.
Vanilla Extract (½ teaspoon) — Pure vanilla extract, not imitation. It adds a warm, aromatic depth that makes the chocolate taste more complex. If you’re feeling fancy, you can use vanilla bean paste, but regular extract works perfectly fine.
Optional: Flavor Extracts — Orange extract, peppermint, or almond extract can all work here. I love adding a drop of orange extract to dark chocolate—it’s a classic combination. Just be careful not to add too much liquid, as water can seize chocolate.
Equipment Needed
You don’t need a professional kitchen to make these. Here’s what I actually use, and what you can swap out.
- Microwave-Safe Bowl — A glass or ceramic bowl is best. It heats evenly and you can see the chocolate melting. If you prefer stovetop, use a heatproof bowl over a pot of simmering water (a makeshift double boiler).
- Silicone Molds — This is crucial. You need flexible silicone molds in the shape of cups or spheres. Rigid plastic or metal molds can be tricky because the chocolate shrinks as it cools and might get stuck. Silicone pops right out. I have a set from Amazon that’s been in my drawer for years and is still in perfect condition.
- Offset Spatula — Or just a regular spoon. You need something to spread the chocolate evenly along the sides of the mold. An offset spatula gives you more control, but a spoon works in a pinch.
- Piping Bag or Ziploc Bag — If you’re adding a filling, you’ll need a way to get it into the cups neatly. A small piping bag is ideal, but a Ziploc bag with the corner snipped off works great too.
- Refrigerator — You’ll need space in your fridge to let the chocolate set. If your fridge is crowded, this might be a bottleneck!
Pro Tip: Make sure your silicone molds are completely clean and dry. Even a drop of water can cause the chocolate to seize or not stick to the sides properly.
How to Make It: Step-by-Step
Alright, let’s make these rich dark chocolate cups. I’m walking you through exactly how I do it, including the little tricks I’ve picked up to ensure they come out perfect every time.
Step 1: Prepare Your Molds
Take your silicone molds and place them on a flat baking sheet or tray. This gives you stability when you’re filling them and makes it easier to move them in and out of the fridge. Check that there’s no dust or debris in the molds. If you’re making filled cups, make sure you have your filling ready to go, or at least your chocolate melted and ready, because things move fast.
Step 2: Melt the Chocolate
This is the most critical step. Chop your chocolate bars into small, uniform pieces if they aren’t already. Smaller pieces melt more evenly. Place the chocolate in your microwave-safe bowl along with the cocoa butter and butter.
Micro Method: Heat on 50% power (medium-low) in 30-second intervals. After each interval, remove the bowl and stir vigorously. Even if it looks melted, there might be unmelted chunks. Continue until the chocolate is smooth and glossy. This usually takes about 2-3 minutes total, depending on your microwave.
Stovetop Method: Fill a small saucepan with an inch of water and bring to a gentle simmer. Place your heatproof bowl on top, ensuring the bottom doesn’t touch the water. Stir the chocolate constantly until melted and smooth. Be very careful not to get any water in the chocolate, as even a tiny drop can cause it to seize and become grainy.
Step 3: Flavor and Adjust
Once the chocolate is completely melted and smooth, remove it from the heat. Stir in the vanilla extract and sea salt. If you’re adding other extracts, do it now. Taste a tiny drop (let it cool first!) to check the flavor. If it tastes too sweet, you can add a tiny bit more salt. If it’s too bitter, a pinch more sugar or a drop more vanilla can help. The chocolate should be warm but not hot.
Step 4: Coat the Molds
Pour a generous amount of the melted chocolate into each mold cavity. You want enough to coat the entire surface. Using your offset spatula or the back of a spoon, spread the chocolate evenly along the bottom and up the sides of each cup. Make sure there are no thin spots or holes—if you can see light through the chocolate, add more.
Key Technique: Tap the baking sheet gently on the counter a few times. This helps the chocolate settle into the corners and removes any air bubbles. You want a smooth, even shell.
Step 5: The First Set
Place the tray in the refrigerator for about 15-20 minutes. You want the chocolate to set completely. It should be firm to the touch and no longer tacky. This step creates the base shell. If you’re making filled cups, this is your pause point. If you’re making empty cups, you can proceed to step 6 or skip to unmolding.
Step 6: Add Filling (Optional)
If you’re adding a filling, now is the time. I love a simple ganache filling. Just heat heavy cream until simmering, pour over chopped chocolate, let it sit for a minute, then stir until smooth. Let the ganache cool slightly so it’s thick but spreadable.
Using a piping bag or a small spoon, add a dollop of filling to the center of each chocolate shell. Don’t overfill—if you’re adding too much, the chocolate might crack when you seal it. Leave a little room at the top.
Step 7: Seal the Cups
If you’re adding filling, you need to seal the top. Take the remaining melted chocolate (or melt a fresh small batch) and carefully pour or pipe a thin layer over the filling to seal it. Smooth the top with your spatula so it’s flat. If you’re making empty cups, you can skip this, but I recommend adding a tiny bit of chocolate to the rim to smooth out any imperfections.
Step 8: Final Set and Unmolding
Return the tray to the refrigerator for another 20-30 minutes. The chocolate needs to be completely hard. Once it’s set, gently press on the bottom of the silicone molds. The cups should pop right out. If they’re sticking, put them back in the freezer for 5 minutes—cold chocolate contracts and releases easier.
Place the finished cups on a serving platter. They are ready to eat immediately, but they taste even better after sitting for a few hours as the flavors meld.
Expert Tips & Tricks
Here’s everything I’ve learned from making these dozens of times. These tips will save you from my early mistakes and ensure your cups look professional.
- Don’t Rush the Melting — The biggest mistake people make is heating the chocolate too fast. If you use high power in the microwave, the chocolate can scorch or seize. Low and slow is the way to go. Stirring constantly is key to even heat distribution.
- Keep it Dry — I can’t stress this enough. Water is chocolate’s enemy. Even a drop of water from a wet spoon can cause the chocolate to seize into a grainy lump. Make sure all your equipment is bone dry.
- Work Quickly — Chocolate starts to set as soon as it cools. Once it’s melted, work efficiently to coat the molds. If it starts to thicken too much, you can gently rewarm it, but it’s better to be prepared.
- Use Good Chocolate — The quality of your final product is directly tied to the quality of your chocolate. Cheap chocolate with vegetable oils won’t snap or shine like good couverture or high-quality bars. Invest in good chocolate; it’s worth it.
- Temperature Control — If your kitchen is very hot, the chocolate might not set properly. Keep your molds in the fridge until you’re ready to serve. If you’re serving them at room temperature, make sure they’re cool to the touch.
- Storage is Key — Store your finished cups in an airtight container in the fridge. They can last up to two weeks. If you’re freezing them, thaw them in the fridge overnight to prevent condensation, which can ruin the shine.
Pro Trick: For a restaurant-quality finish, dip the rim of each cup in melted chocolate and sprinkle with edible gold dust or crushed nuts before the chocolate fully sets. It adds a touch of luxury.
Variations & Substitutions
Once you’ve nailed the basic version, here’s how you can mix it up. I’ve tried all of these, and they’re all delicious.
Flavor Variations
Sea Salt Caramel Cups — Fill with homemade salted caramel sauce. The salt enhances the chocolate beautifully. I make a batch of caramel on weekends and keep it in the fridge for this.
Orange Dark Chocolate — Add ½ teaspoon orange extract to the melted chocolate and sprinkle with candied orange peel before setting. It’s a classic combination that feels very festive.
Mint Chocolate — Add a few drops of peppermint extract to the chocolate. These are perfect for holidays and look great with a white chocolate drizzle on top.
Spiced Chocolate — Add a pinch of cinnamon, cayenne, or cardamom to the melted chocolate. A little heat from cayenne makes the chocolate taste richer and more complex.
Dietary Modifications
Vegan Version — Use vegan dark chocolate (many high-end brands are naturally vegan) and substitute the butter with coconut oil or vegan butter. Ensure your cocoa butter is vegan (most is, but check labels). Fill with coconut cream ganache.
Sugar-Free — Use sugar-free dark chocolate chips or bars. Note that the texture might be slightly different, and some sugar alcohols can have a cooling effect. Fill with a sugar-free ganache made with heavy cream and sugar-free chocolate.
Gluten-Free — This recipe is naturally gluten-free, as long as your chocolate and fillings don’t contain cross-contaminated ingredients. Always check labels if you have celiac disease.
Fillings
Nut Praline — Crushed hazelnuts or almonds mixed with a little caramel. Adds crunch and sophistication.
Fresh Fruit — A single raspberry or strawberry in the center. The tartness cuts through the rich chocolate. Just make sure the fruit is dry to prevent seizing.
Cookie Dough — A small ball of edible cookie dough. This is a crowd-pleaser, especially for kids.
Serving & Storage
These rich dark chocolate cups are elegant enough for any occasion, but they’re also simple enough for a casual snack. Here’s how I serve and store them.
How to Serve
I usually serve these on a small plate or in a decorative bowl. They look stunning when arranged in a circle with a dusting of powdered sugar or cocoa powder. For dinner parties, I serve one per person as a palate cleanser or a light dessert after coffee.
Pairing Suggestions:
- Coffee: A strong espresso or cappuccino is the classic pairing. The bitterness of the coffee complements the dark chocolate.
- Wine: A Port or a sweet dessert wine works beautifully. I also like a light red like a Pinot Noir if you prefer dry.
- Tea: Earl Grey or chai tea adds a nice aromatic contrast.
If you’re feeling fancy, serve these alongside my grilled peaches dessert for a warm and cool contrast that’s perfect for summer evenings.
Storage Instructions
Refrigerator: Store in an airtight container in the fridge for up to 2 weeks. Place parchment paper between layers if you’re stacking them to prevent sticking. They will stay firm and glossy.
Freezer: You can freeze these for up to 3 months. Place them in a freezer-safe container with parchment paper between layers. Thaw in the refrigerator overnight before serving. Do not thaw at room temperature, as condensation will ruin the shine.
Room Temperature: If your kitchen is cool (below 70°F / 21°C), you can store them at room temperature for a few days. However, in warmer weather, they will melt. I always err on the side of caution and keep them in the fridge.
Pro Tip: If you’re bringing these to a potluck or party, keep them in a cooler with ice packs until you arrive. Chocolate is sensitive to heat, and you don’t want a melted mess.
Nutrition Information
I’m not a nutritionist, but here’s the breakdown if you’re tracking. These are rich, so a little goes a long way.
Per Cup (based on 12 cups, no filling):
- Calories: 110
- Protein: 1g
- Carbs: 10g
- Fiber: 1g
- Sugar: 7g
- Fat: 8g
- Saturated Fat: 5g
What’s Good:
- Dark chocolate is rich in antioxidants like flavonoids.
- Small portion size helps with calorie control.
- Minimal sugar compared to milk chocolate desserts.
What to Know:
- High in fat and calories due to the chocolate and cocoa butter.
- Contains dairy (unless using vegan alternatives).
- Moderate sugar content.
My Take: Look, this is a dessert. It’s meant to be indulgent. Enjoy one or two cups and savor the flavor. It’s much better for you than a slice of cake or a bowl of ice cream, and it satisfies that sweet tooth without leaving you feeling sluggish.
Final Thoughts
So that’s my go-to rich dark chocolate cups recipe! I’ve talked your ear off at this point, but when you make a recipe this often, you have a lot to say about it. These cups have become my secret weapon for entertaining. They’re elegant, they’re delicious, and they’re surprisingly easy to make.
I remember feeling so intimidated by chocolate work when I first started. I thought it required special skills and equipment. But these cups proved me wrong. They showed me that with a little patience and the right technique, I could create something beautiful and professional in my own kitchen. Now, I make them regularly, experimenting with different fillings and flavors. They’ve even become a favorite of my friends, who always ask for the recipe.
Make it yours! Try different extracts, add nuts, or fill them with your favorite jam. The best recipes are the ones you adapt to your tastes. I’d love to see what you create. If you make these, drop a comment and let me know what filling you chose. I love hearing how recipes turn out in your kitchen.
And if you’re looking for more easy, elegant desserts, check out my peach cobbler bars for a fruity, crumbly treat that’s perfect for autumn. Or try these sugar-free dark chocolate almond bark if you’re watching your sugar intake. Happy cooking, and I hope your kitchen smells as good as mine does right now!
Frequently Asked Questions
Q: Can I use milk chocolate instead of dark chocolate?
A: You can, but the cups will be sweeter and softer. Dark chocolate has a higher cocoa butter content and sets harder, which is why it’s better for this application. If you use milk chocolate, keep them in the fridge until serving, as they may melt quickly at room temperature. I recommend sticking with dark chocolate for the best texture and flavor.
Q: Why did my chocolate seize?
A: Seizing happens when water gets into the chocolate. Even a drop of water can cause the cocoa particles to clump together, turning the smooth chocolate into a grainy, solid mass. To fix it, you can add a little warm cream or milk and stir vigorously to create a ganache, but you won’t be able to use it for molding again. Prevention is key—keep everything dry!
Q: Can I make these without a mold?
A: It’s difficult, but you can try. You can pour a thin layer of chocolate into the bottom of a muffin tin lined with parchment paper, let it set, add filling, and seal with another layer. However, the shapes won’t be as uniform or professional as using silicone molds. I highly recommend investing in a set of silicone molds—they’re inexpensive and make the process so much easier.
Q: How long does it take for the chocolate to set?
A: In the refrigerator, it usually takes 15-20 minutes for the base shell to set and 20-30 minutes for the final seal. If you’re in a hurry, you can put them in the freezer for 10 minutes, but be careful not to let them get too cold, as condensation can form when you take them out. Room temperature setting can take 1-2 hours, depending on the ambient temperature.
Q: Can I fill these with fresh fruit?
A: Yes, but the fruit must be completely dry. Any moisture on the fruit can cause the chocolate to seize. I recommend using fresh raspberries or strawberries, but pat them dry thoroughly with a paper towel before adding. You can also use dried fruit, like apricots or figs, which add a chewy texture and tartness.
Q: Why are my cups cloudy or white?
A: This is called “bloom.” It can happen if the chocolate was stored improperly or if condensation formed on the cups. Sugar bloom happens when sugar dissolves in moisture and recrystallizes on the surface. Fat bloom happens when cocoa butter separates and rises to the surface. To prevent this, store your cups in a cool, dry place in an airtight container. If you see bloom, the chocolate is still safe to eat, but the appearance and texture may be slightly affected.
Q: Can I double this recipe?
A: Absolutely! Just make sure you have enough silicone molds. If you’re melting the chocolate in the microwave, you may need to do it in batches if your bowl is small. Stirring is even more important when melting larger quantities to ensure even heating. The process is the same, just scale up the ingredients.
Pin This Recipe!
Rich Dark Chocolate Cups: 5-Ingredient Easy Elegant Dessert
- Total Time: 25 minutes
- Yield: 12 servings 1x
Description
Foolproof, elegant dark chocolate cups that require no tempering or fancy equipment. These crisp, glossy shells are made with just five ingredients and can be filled with ganache, caramel, or fruit.
Ingredients
- 12 ounces (340g) high-quality dark chocolate (at least 60% cocoa solids), chopped
- 1 tablespoon (14g) cocoa butter
- 1 teaspoon (5g) unsalted butter
- ¼ teaspoon fine sea salt
- ½ teaspoon pure vanilla extract
- Optional flavorings: orange extract, peppermint extract, or almond extract
Instructions
- Place silicone molds on a flat baking sheet for stability.
- Chop chocolate into small, uniform pieces and place in a microwave-safe bowl with cocoa butter and unsalted butter.
- Melt chocolate using the microwave method: heat on 50% power in 30-second intervals, stirring vigorously between each interval until smooth and glossy (approx. 2-3 minutes). Alternatively, use a double boiler on the stovetop, stirring constantly until melted.
- Remove from heat and stir in vanilla extract and sea salt. Taste and adjust if necessary.
- Pour melted chocolate into each mold cavity. Use an offset spatula or spoon to spread chocolate evenly along the bottom and up the sides, ensuring no thin spots.
- Tap the baking sheet gently on the counter to remove air bubbles and settle the chocolate.
- Refrigerate for 15-20 minutes until the chocolate shell is firm and no longer tacky.
- Optional: Add filling (such as ganache, caramel, or fresh fruit) to the center of each shell.
- Seal the cups by pouring a thin layer of remaining melted chocolate over the filling or smoothing the rim of empty cups.
- Refrigerate for another 20-30 minutes until completely hard.
- Gently press the bottom of the silicone molds to release the cups. If sticking, freeze for 5 minutes.
- Serve immediately or store in an airtight container.
Notes
Ensure all equipment is completely dry, as even a drop of water can cause the chocolate to seize. For best results, use high-quality couverture or bar chocolate rather than chocolate chips, which contain stabilizers. Store in the fridge for up to 2 weeks or freeze for up to 3 months.
- Prep Time: 15 minutes
- Cook Time: 10 minutes
- Category: Dessert
- Cuisine: American
Nutrition
- Serving Size: 1 cup
- Calories: 110
- Sugar: 7
- Sodium: 15
- Fat: 8
- Saturated Fat: 5
- Carbohydrates: 10
- Fiber: 1
- Protein: 1
Keywords: dark chocolate cups, chocolate dessert, easy chocolate recipe, 5 ingredient dessert, elegant dessert, chocolate truffles, vegan chocolate, gluten-free dessert


