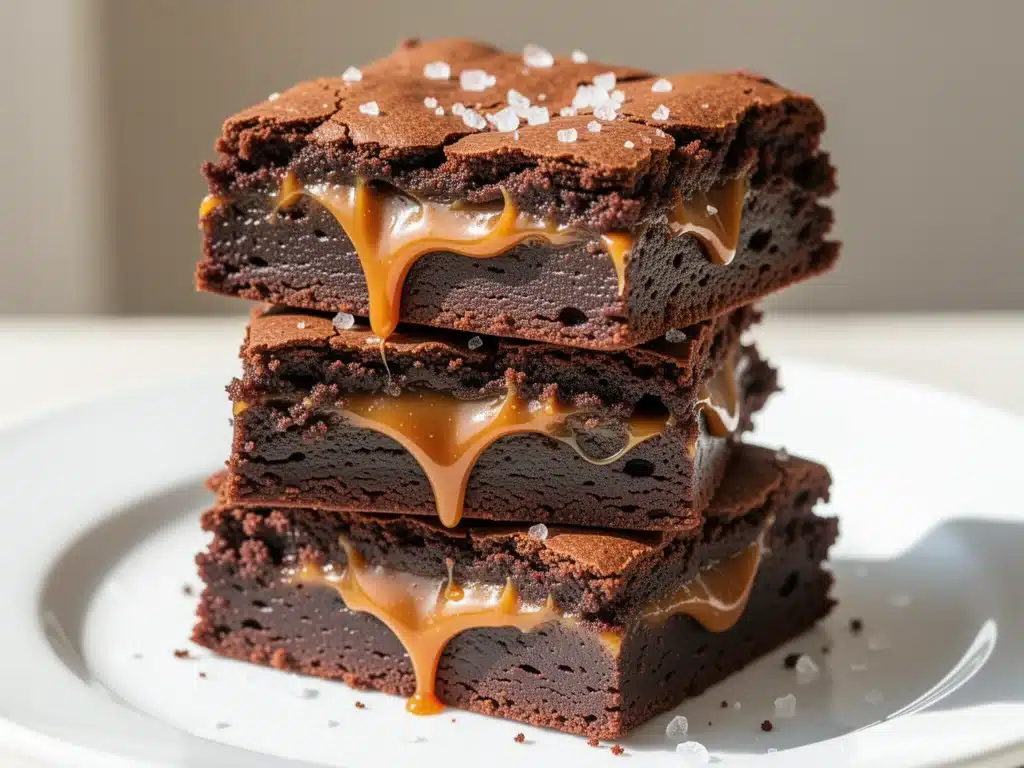
It’s that specific, sticky time of year when the air is still heavy with humidity, but the light has shifted just enough to feel like autumn is knocking at the door. This is the “end of summer” limbo. You’re tired of grilled corn and cold salads, but you’re not quite ready for pumpkin spice everything. You want something rich, something indulgent, and something that feels like a celebration of the last warm evenings.
That’s exactly when I fell in love with these salted caramel brownie bars. I made them three times in one week last August because my family kept asking for more, and I was terrified I’d run out before the season really ended. The first time, I undercooked them slightly—chewy, gooey centers that were absolutely divine. The second time, I burned the caramel in the saucepan (my bad). The third time, I got it right. Perfectly fudgy, with ribbons of homemade salted caramel that actually stay soft instead of turning into hard candy, and a dusting of flaky sea salt that makes every bite addictive.
These aren’t your average boxed-mix brownies. They’re dense, chocolatey, and layered with that sweet-salty combo that hits all the right receptors. I’ve tested this salted caramel brownie bars recipe over a dozen times now, tweaking the ratio of chocolate to caramel, adjusting the bake time for different oven quirks, and perfecting the caramel sauce so it doesn’t seize up. The result? A dessert that’s easy enough for a weeknight but fancy enough to bring to a potluck. If you’re looking for a way to cap off summer with something sweet and satisfying, this is it. It’s the ultimate comfort dessert.
Why You’ll Love These End of Summer Dessert Bars
There’s a reason this salted caramel brownie bars recipe has become my go-to when I need to impress without spending hours in the kitchen. Here’s the real talk on why these bars work so well, especially right now when the weather is still warm but your cravings are leaning toward something heavier.
- Homemade Caramel Without the Headache — Most caramel recipes require a candy thermometer and constant stirring, which is stressful when you’re trying to relax. I’ve developed a stovetop method that’s forgiving. You just melt butter, sugar, and cream together. It’s simple, but the result is silky smooth. No grainy bits, no burning. Just pure, buttery sweetness.
- Truly Fudgy, Not Cakey — I hate dry brownies. They’re like eating cardboard. These bars are dense and moist, with a crackly top that shatters when you cut them. I achieve this by using extra egg yolks and melting the chocolate with butter rather than using cocoa powder. It makes a huge difference in texture.
- Perfect for Warm Weather — Unlike some desserts that need to be chilled for hours, these brownie bars are best at room temperature or slightly warm. They don’t get weirdly hard in the fridge like cheesecake or mousse. You can make them ahead, bring them to a summer barbecue, and they’ll stay perfect.
- Make-Ahead Friendly — Life gets busy. I love that I can make the caramel sauce and brownie batter a day before. Store them separately in the fridge, then assemble and bake the next day. It saves me so much stress when I have guests coming over.
- The Salt Factor — This isn’t just garnish. The flaky sea salt on top cuts through the sweetness of the caramel and chocolate, balancing the flavors perfectly. It makes the chocolate taste more intense and the caramel more complex. It’s the secret weapon.
These bars are my answer to “what’s for dessert?” when I want something that feels special but doesn’t require a degree in pastry arts. They’re reliable, delicious, and always disappear. If you’ve ever tried homemade cinnamon roll bites for a cozy treat, you’ll understand the joy of a homemade dessert that’s worth the extra effort. These brownie bars are in that same category—comforting, indulgent, and totally worth it.
Ingredients You’ll Need for Salted Caramel Brownie Bars
Before we get to the mixing bowls, let’s talk about what’s actually going into these bars. I’m pretty particular about a few key ingredients here because they make or break the texture. You don’t need anything exotic, but you do need to pay attention to quality.
For the Brownie Base
Dark chocolate chips (12 ounces / 340g) — I use semi-sweet or bittersweet chocolate chips (around 60% cocoa). Do not use chocolate chunks that are too large, as they don’t melt as evenly. Guittard or Ghirardelli are my favorites. This is the backbone of the flavor.
Unsalted butter (1 cup / 226g) — Room temperature or melted. I prefer melting it for a fudgier texture. Use real butter, not margarine. The water content in margarine can make the brownies cakey.
Granulated sugar (1½ cups / 300g) — This provides the structure and the crackly top. Don’t reduce the sugar too much, or you’ll lose that signature texture.
Dark brown sugar (1 cup / 200g) — This adds moisture and a hint of molasses flavor. It’s crucial for the chewiness. Light brown sugar works, but dark is better.
Eggs (3 large + 2 yolks) — The extra yolks are my secret. They add richness and fat, which makes the brownies dense and fudgy instead of airy. I always separate them when I’m baking.
Vanilla extract (2 teaspoons) — Use real vanilla, not imitation. It enhances the chocolate flavor.
All-purpose flour (1 cup / 125g) — Just enough to hold it together. Don’t add too much, or they’ll be dry. Sift it if you can to avoid lumps.
Cocoa powder (¼ cup / 25g) — Unsweetened cocoa powder adds depth. I use Dutch-processed cocoa for a darker, richer color and flavor.
Salt (½ teaspoon) — Enhances the chocolate flavor.
For the Salted Caramel Sauce
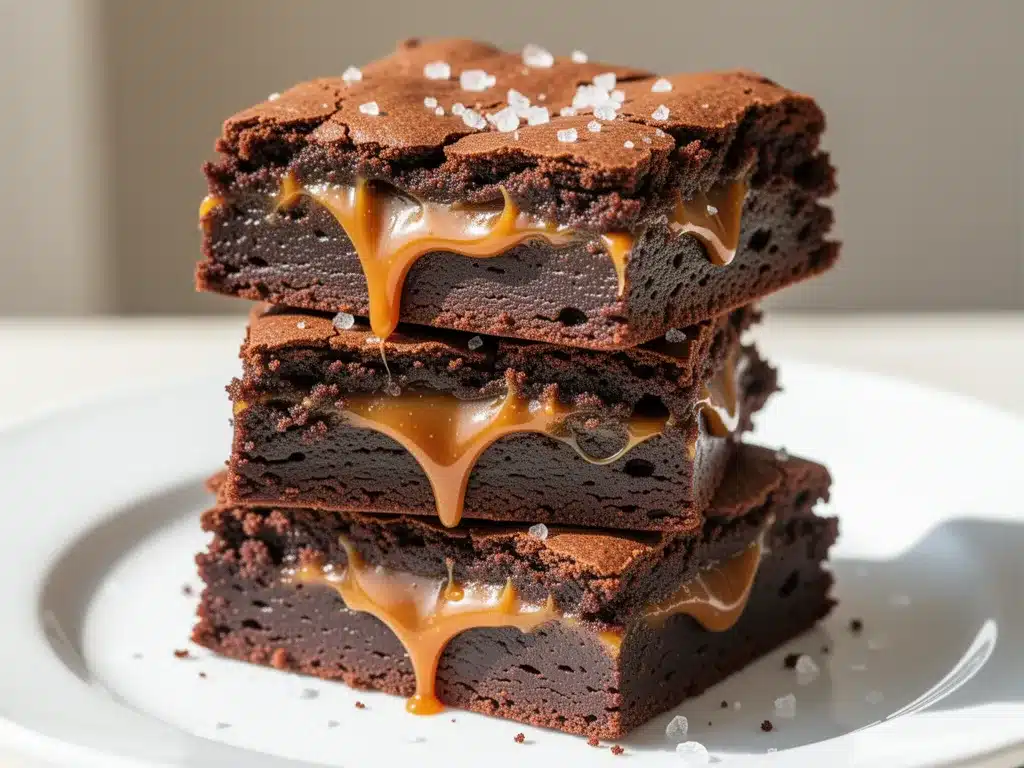
Granulated sugar (1 cup / 200g) — The base of the caramel. Watch it carefully as it melts.
Unsalted butter (½ cup / 113g) — Adds richness and stops the cooking process.
Heavy cream (½ cup / 120ml) — Warm it up first! Adding cold cream to hot caramel can cause it to splatter violently. I heat it in the microwave for 30 seconds.
Flaky sea salt (1 teaspoon) — For the sauce itself, plus more for sprinkling on top.
For the Finish
Extra chocolate chips (½ cup / 85g) — Sprinkled on top for extra gooeyness.
Flaky sea salt (for garnish) — Maldon is my go-to, but any flaky salt works.
I keep these ingredients stocked because I make this salted caramel brownie bars recipe so often. If you’re in the mood for something lighter, you might check out sugar-free dark chocolate almond bark, but let’s be honest—sometimes you just need the real deal.
Equipment Needed
You don’t need a fancy kitchen for this. Here’s what I actually use, along with some honest opinions on alternatives.
9×13 inch baking dish — I use a glass Pyrex dish because it heats evenly. Metal works too, but glass is more forgiving. Grease it well with butter or non-stick spray.
Medium saucepan — For making the caramel. I prefer stainless steel because I can see the color of the sugar clearly. Dark pans can hide the burning process, so be careful.
Mixing bowls — Two large bowls. One for the wet ingredients, one for the dry. I use glass bowls because they’re easy to clean.
Whisk and spatula — A silicone spatula is essential for scraping the bowl and folding in the flour. Don’t use a metal spoon; it won’t get everything out.
Measuring cups and spoons — For accuracy. Baking is chemistry, after all.
Parchment paper — Line your baking dish with parchment, leaving an overhang on the sides. This is non-negotiable for easy removal. Nothing is worse than trying to pry brownies out of a greased pan.
Wooden spoon — For stirring the caramel. It’s easier to control than a metal spoon.
I’m not a fan of fancy gadgets for this recipe. A simple setup works best. If you need a tool for other desserts, my honey lavender iced latte recipe only needs a whisk and a mason jar, so you’re already set up for success.
How to Make Salted Caramel Brownie Bars: Step-by-Step
Alright, let’s get cooking! This process is straightforward, but there are a few tricks to get that perfect layering and texture. I’m walking you through exactly how I do it, including the little details that matter.
Step 1: Prep Your Pan and Oven (5 minutes)
Preheat your oven to 350°F (175°C). Line your 9×13 inch baking dish with parchment paper, leaving a 2-inch overhang on the long sides. This makes it super easy to lift the bars out later. Grease the parchment with butter or cooking spray. This step is crucial for clean cuts.
Step 2: Make the Salted Caramel Sauce (15 minutes)
Start with the caramel because it needs to cool before you pour it. In a medium saucepan, combine 1 cup of granulated sugar and ¼ cup of water. Cook over medium heat, stirring constantly until the sugar dissolves. Then, stop stirring! Let it bubble and turn amber-colored. This takes about 5-7 minutes. Watch it closely—it can go from perfect to burnt in seconds.
Once it’s a deep amber color, remove from heat. Carefully stir in ½ cup of warm heavy cream and ½ cup of softened butter. The mixture will bubble up violently, so be careful. Stir in 1 teaspoon of flaky sea salt. Pour the caramel into a heatproof bowl and let it cool completely. It will thicken as it cools. If it’s too thick, microwave it for 10 seconds to loosen it up.
Step 3: Melt the Chocolate and Butter (5 minutes)
In a large microwave-safe bowl, combine 12 ounces of dark chocolate chips and 1 cup of unsalted butter. Microwave in 30-second intervals, stirring between each, until smooth. This takes about 1-2 minutes total. Don’t overheat it, or the chocolate will seize. Let it cool slightly.
Step 4: Mix the Wet Ingredients (3 minutes)
Whisk the melted chocolate-butter mixture with 1½ cups granulated sugar, 1 cup brown sugar, 3 eggs, 2 egg yolks, and 2 teaspoons vanilla extract. Whisk vigorously for about 2 minutes. This step incorporates air and helps create that crackly top. The mixture should look glossy and thick.
Step 5: Add the Dry Ingredients (2 minutes)
Sift 1 cup of flour, ¼ cup cocoa powder, and ½ teaspoon salt over the wet mixture. Gently fold in with a spatula until just combined. Do not overmix! Overmixing develops gluten and makes the brownies tough. Stop when you see no more streaks of flour.
Step 6: Assemble the Layers (5 minutes)
Pour half of the brownie batter into the prepared pan. Spread it evenly. Now, drizzle the cooled caramel sauce over the batter. Use a knife or skewer to swirl the caramel into the batter slightly, but don’t mix it completely. You want ribbons of caramel.
Pour the remaining brownie batter on top and spread it gently to cover the caramel. Sprinkle the remaining ½ cup of chocolate chips on top. This ensures every bite has chocolate.
Step 7: Bake (30-35 minutes)
Bake in the preheated oven for 30-35 minutes. The edges should be set and pulling away slightly from the sides, but the center should still jiggle a little. This is key for fudgy brownies. If you bake until the center is firm, they’ll be cakey. Insert a toothpick into the center—it should come out with moist crumbs, not wet batter.
Step 8: Cool and Garnish (1 hour)
Let the brownies cool completely in the pan on a wire rack. This takes at least an hour. If you cut them warm, they’ll fall apart. Once cool, sprinkle with flaky sea salt. Lift the brownies out using the parchment overhang, and cut into squares. Enjoy!
If you’re curious about other easy baking projects, this technique is similar to what I use for high-protein peanut butter cookie dough bites, though those are no-bake. The key is always letting things cool before cutting.
Expert Tips & Tricks for Perfect Brownies
Here’s everything I’ve learned from making these brownie bars dozens of times. These tips will save you from my mistakes and guarantee success.
Don’t Overbake — This is the #1 mistake. Brownies continue to cook in the pan after you take them out of the oven. Pull them when the center still looks slightly underdone. They’ll set as they cool. I learned this the hard way with a batch of dry, cakey brownies that ruined my weekend.
Warm the Cream — Always warm your heavy cream before adding it to the hot sugar for the caramel. Cold cream can cause the caramel to seize and become grainy. I heat it in the microwave for 30 seconds. It’s a small step that makes a big difference.
Whisk the Sugar and Eggs — When mixing the brownie batter, whisk the sugar and eggs with the chocolate mixture for a full 2 minutes. This creates that shiny, crackly top. It’s a classic brownie trick that works every time.
Use Quality Chocolate — The chocolate is the star. Don’t use cheap, waxy chips. Use a brand you enjoy eating. Guittard, Ghirardelli, or Callebaut are great choices. The flavor of the brownie will reflect the quality of the chocolate.
Let Them Cool Completely — I know it’s tempting to cut into them warm, but patience pays off. Warm brownies are messy and hard to cut. Cool them completely for clean, neat squares.
Storage — Store brownies in an airtight container at room temperature for up to 5 days. They actually taste better on day 2, as the flavors meld together. If you live in a hot climate, store them in the fridge, but let them come to room temperature before serving.
Variations & Substitutions
Once you’ve nailed the basic version, here’s how you can mix it up. I’ve tried all of these variations, and they all work well.
Nutty Version — Add 1 cup of chopped pecans or walnuts to the brownie batter. Toast the nuts first for extra flavor. This adds crunch and breaks up the density.
White Chocolate Caramel — Swap the dark chocolate chips for white chocolate chips in the base. The sweetness is higher, so reduce the sugar in the caramel slightly. It’s a classic combination.
Espresso Boost — Add 1 tablespoon of instant espresso powder to the brownie batter. It enhances the chocolate flavor without making it taste like coffee. It’s a game-changer for chocolate lovers.
Gluten-Free — Use a 1:1 gluten-free flour blend. The texture will be slightly different, but still delicious. I’ve used Bob’s Red Mill and it works great.
Vegan — Replace butter with vegan butter, eggs with flax eggs (3 tablespoons ground flaxseed + 9 tablespoons water), and use dairy-free chocolate chips. The caramel can be made with coconut cream. It’s not exactly the same, but it’s still tasty.
Mini Bars — For smaller portions, use a 9×9 inch pan and bake for 25-30 minutes. Perfect for lunchboxes or gifts.
If you’re looking for a lighter snack to pair with these rich bars, try sugar-free dark chocolate almond bark. It’s a great way to balance out the sweetness.
Serving & Storage
How to Serve — I usually serve these at room temperature. They’re perfect for potlucks, picnics, or after-dinner dessert. Pair them with a glass of cold milk, a cup of coffee, or even that honey lavender iced latte for a sophisticated touch.
Toppings — Besides the flaky sea salt, you can add whipped cream, fresh berries, or a drizzle of extra caramel. I keep it simple with just the salt.
Refrigerator — Store in an airtight container for up to 5 days. They’ll stay moist and fudgy.
Freezer — Yes, these freeze well! Wrap individual squares in plastic wrap, then place in a freezer bag. They’ll last for 3 months. Thaw at room temperature before eating. I make a double batch specifically for freezing.
Make-Ahead — You can make the caramel sauce and brownie batter up to 2 days ahead. Store them separately in the fridge. Assemble and bake when ready. This is my favorite way to handle dinner parties.
Pro Tip — If the caramel is too thick when you try to spread it, microwave it for 10-15 seconds to loosen it up. It should pour easily but not be runny like water.
Nutrition Information
I’m not a nutritionist, but here’s the breakdown if you’re tracking. Keep in mind that these are rich, indulgent bars, so portion control is key.
Per Serving (based on 16 bars):
- Calories: 380
- Protein: 5g
- Carbs: 45g
- Fiber: 2g
- Sugar: 32g
- Fat: 22g
- Saturated Fat: 13g
- Cholesterol: 65mg
- Sodium: 180mg
What’s Good: Decent protein from the eggs and chocolate. Iron from the dark chocolate.
What to Know: High in sugar and saturated fat. It’s a treat, not a health food. Enjoy in moderation.
My Take: These are decadent brownie bars. They’re not diet food, but they’re homemade, so you know exactly what’s in them. When I make them, I cut them into smaller squares to keep portions reasonable. But honestly? I usually eat two. No regrets.
Final Thoughts
So that’s my go-to salted caramel brownie bars recipe! I’ve probably talked your ear off at this point, but when you make a recipe this often, you have a lot to say about it. These bars have saved my dessert game more times than I can count. They’re my answer to “what’s for dessert?” when I want something that feels special but doesn’t require a trip to the bakery.
This has been my end-of-summer staple for three years now. I love that it captures that feeling of warmth and indulgence before the cold weather sets in. My family loves them, my friends request them, and I’m happy because I’m not stressed about cooking. They’re reliable, delicious, and always a crowd-pleaser.
Make it yours! Try different nuts, add espresso, or swap the chocolate. The best recipes are the ones you adapt to your tastes. If you make this salted caramel brownie bars recipe, drop a comment and let me know what you think! I love hearing how recipes turn out in your kitchen. And if something doesn’t work, tell me that too—I’m here to help troubleshoot.
Happy baking! And I hope your kitchen smells half as good as mine does right now.
Frequently Asked Questions
Q: Can I use milk chocolate instead of dark chocolate?
A: You can, but the brownies will be much sweeter and less intense. I recommend sticking with semi-sweet or bittersweet chocolate for the best balance with the caramel. If you use milk chocolate, reduce the sugar in the caramel slightly.
Q: My caramel turned out grainy—what happened?
A: This usually happens if the sugar didn’t dissolve completely before it started caramelizing, or if the cream was too cold. Make sure to stir the sugar and water until the sugar is fully dissolved before it bubbles. Also, always warm your cream before adding it.
Q: Can I make these ahead for a party?
A: Absolutely! This is one of my favorite make-ahead desserts. Make the caramel and batter a day before. Store them in the fridge. Assemble and bake the next day. They taste just as good as fresh.
Q: Why are my brownies cakey instead of fudgy?
A: You probably overmixed the batter or overbaked them. For fudgy brownies, mix the dry ingredients just until combined, and pull them from the oven when the center still jiggles slightly. Also, using extra egg yolks helps with fudginess.
Q: Can I freeze the caramel sauce?
A: Yes, but it might separate slightly when thawed. Whisk it vigorously or microwave it to recombine. It’s best used fresh, but freezing is an option for meal prepping.
Q: How do I store leftover brownies?
A: Store them in an airtight container at room temperature for up to 5 days. In hot weather, store them in the fridge. They’ll stay moist and delicious.
Q: Can I double this recipe?
A: Yes, but you’ll need a larger pan (like a 9×13 inch pan is already large enough for a double batch? No, a 9×13 is for one batch. For a double batch, use a 9×13 and increase bake time, or use two 9×9 pans. I usually stick to one batch for easier management.
Pin This Recipe!
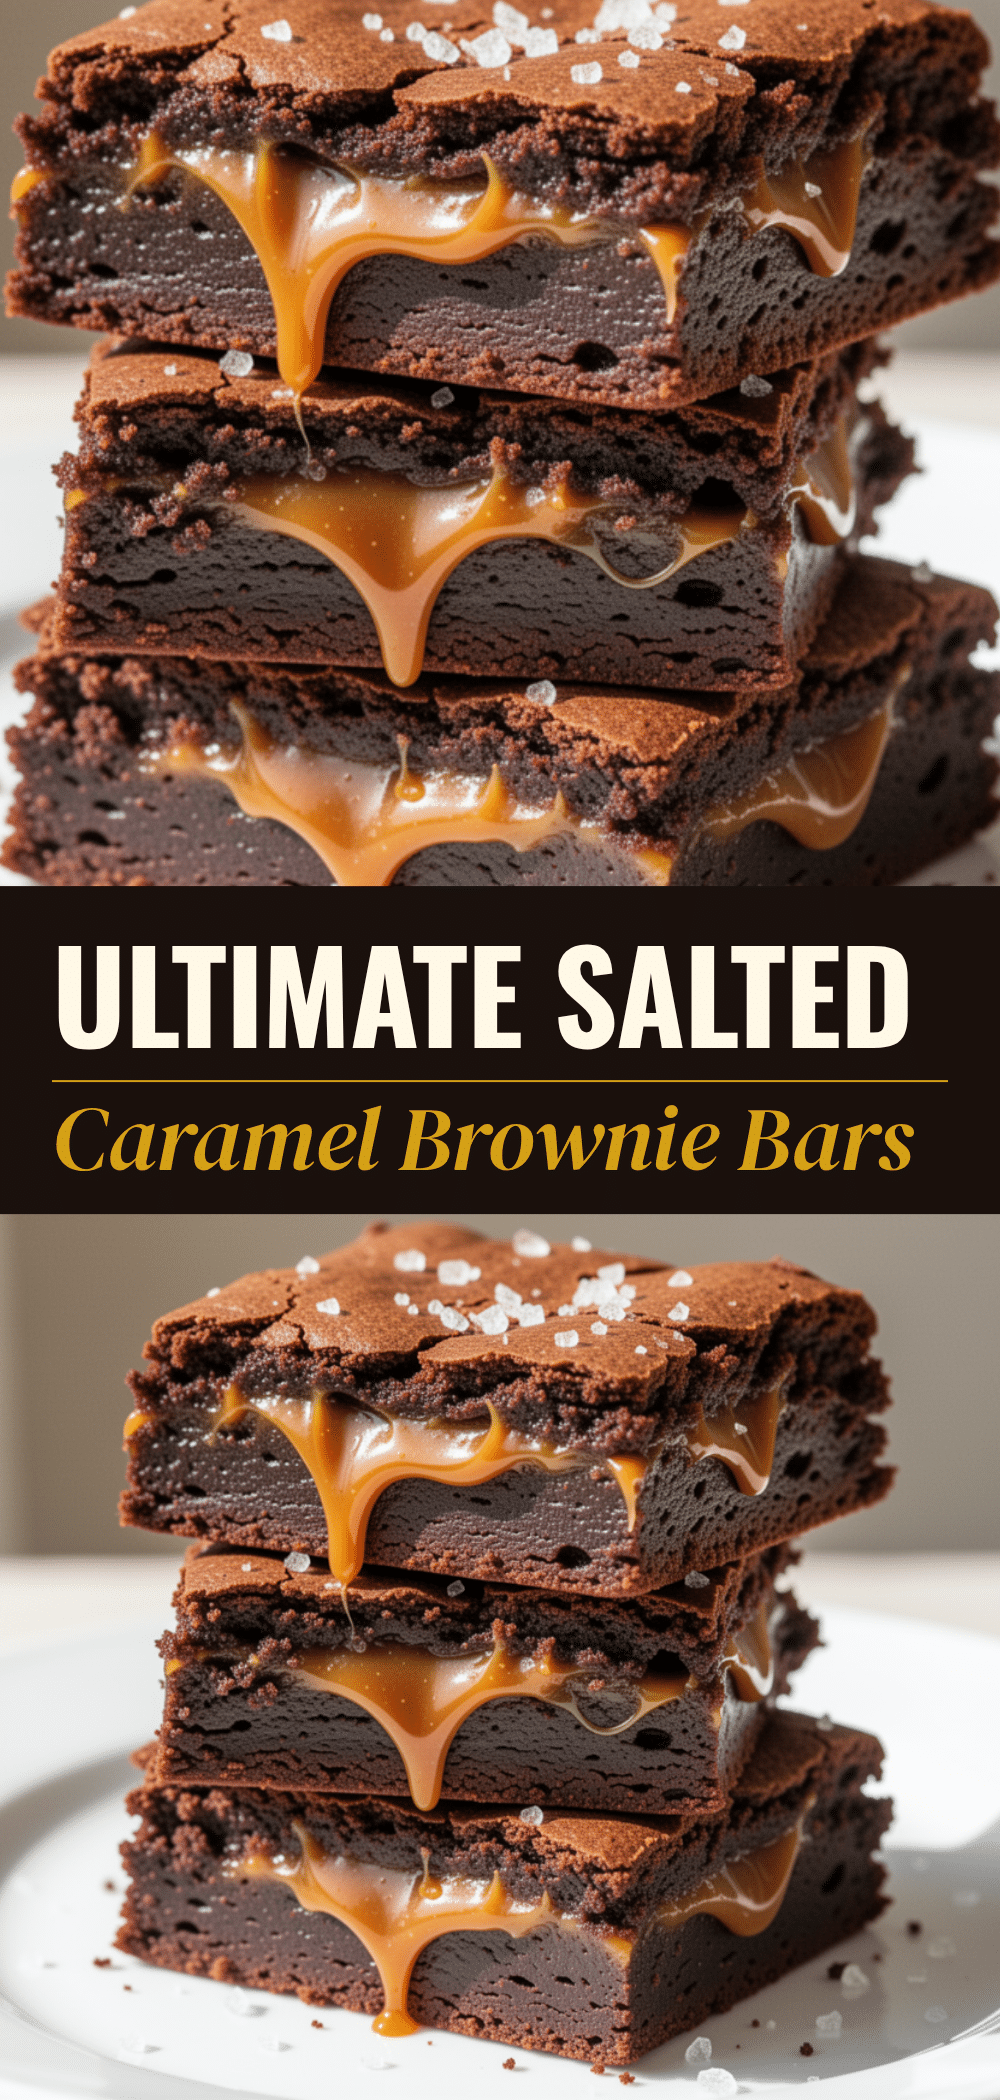
Salted Caramel Brownie Bars: Easy End of Summer Dessert
- Total Time: 55 minutes
- Yield: 16 servings 1x
Description
Dense, fudgy brownie bars layered with homemade salted caramel sauce and topped with flaky sea salt. This recipe delivers a rich, sweet-salty indulgence that is perfect for warm weather and make-ahead entertaining.
Ingredients
- 12 ounces dark chocolate chips (semi-sweet or bittersweet)
- 1 cup unsalted butter (melted)
- 1½ cups granulated sugar
- 1 cup dark brown sugar
- 3 large eggs
- 2 egg yolks
- 2 teaspoons vanilla extract
- 1 cup all-purpose flour
- ¼ cup unsweetened cocoa powder (Dutch-processed)
- ½ teaspoon salt
- 1 cup granulated sugar (for caramel)
- ¼ cup water (for caramel)
- ½ cup heavy cream (warmed)
- ½ cup unsalted butter (for caramel)
- 1 teaspoon flaky sea salt (for caramel)
- ½ cup extra chocolate chips (for topping)
- Flaky sea salt (for garnish)
Instructions
- Preheat oven to 350°F (175°C). Line a 9×13 inch baking dish with parchment paper, leaving a 2-inch overhang on the long sides, and grease with butter or cooking spray.
- In a medium saucepan, combine 1 cup granulated sugar and ¼ cup water. Cook over medium heat, stirring until sugar dissolves, then stop stirring and let bubble until deep amber (5-7 minutes).
- Remove saucepan from heat. Carefully stir in ½ cup warm heavy cream and ½ cup softened butter. Stir in 1 teaspoon flaky sea salt. Pour into a heatproof bowl and let cool completely.
- In a microwave-safe bowl, combine 12 ounces dark chocolate chips and 1 cup melted butter. Microwave in 30-second intervals, stirring between each, until smooth. Let cool slightly.
- Whisk the chocolate-butter mixture with 1½ cups granulated sugar, 1 cup brown sugar, 3 eggs, 2 egg yolks, and 2 teaspoons vanilla extract for 2 minutes until glossy and thick.
- Sift 1 cup flour, ¼ cup cocoa powder, and ½ teaspoon salt over the wet mixture. Gently fold in with a spatula until just combined.
- Pour half the brownie batter into the prepared pan. Drizzle cooled caramel sauce over the batter and swirl slightly with a knife. Pour remaining batter on top and sprinkle with ½ cup chocolate chips.
- Bake for 30-35 minutes until edges are set and center still jiggles slightly. Insert a toothpick to check for moist crumbs.
- Cool completely in the pan on a wire rack (at least 1 hour). Sprinkle with flaky sea salt, lift out using parchment, and cut into squares.
Notes
Do not overbake; brownies continue to cook in the pan after removal. Always warm the heavy cream before adding to hot caramel to prevent seizing. Whisk sugar and eggs vigorously for a crackly top. Store in an airtight container at room temperature for up to 5 days or freeze for 3 months.
- Prep Time: 20 minutes
- Cook Time: 35 minutes
- Category: Dessert
- Cuisine: American
Nutrition
- Serving Size: 1 bar
- Calories: 380
- Sugar: 32
- Sodium: 180
- Fat: 22
- Saturated Fat: 13
- Carbohydrates: 45
- Fiber: 2
- Protein: 5
Keywords: salted caramel brownies, end of summer dessert, fudgy brownies, homemade caramel, easy baking, make-ahead dessert, chocolate bars


